End of the Year Simple Ayurvedic Seasonal Transition Tips for Balance & Bliss over the Holidays!

Hello beautiful friends & happy December!

…Over here, where I am (home-base Byron Bay/Northern Rivers – Southern hemisphere Australia), we are enjoying the gradual change of the seasons… Spring going into Summer.

The frangipani trees in our street are sprouting their gorgeous thick leaves and white and gold blooms, the birds in the trees of a morning are singing and chattering with extra fervour and joy, and the days are feeling more humid, warm and also are getting longer… (With first light at around 5.30am now and Sunset as late as 7.30pm.) We’ve also been having lots of summery-spring rain on an off – giving the earth such a good drink (and my little flower and vegie gardens!) cooling things down and providing a cosy invitation to enjoy being at home, going more ‘inward’, getting into some baking and creative cooking/recipe exploration and more resting (in my case, with our baby on the way, currently 8-months pregnant as I write this post, ‘nesting’!)

I always find the rain to be so refreshing – cleansing, purifying and ‘resetting’… and the perfect opportunity to sit and journal, draw, do some ‘art’ or, like this morning, to open my laptop and write this fresh post – to support balance in this season!

Whether you’re in the Southern hemisphere like me, or on the other side of this magical world in the Northern hemisphere – I hope you are thoroughly enjoying and relaxing into the seasonal transition that is currently going on right now for you…

In Ayurveda seasonal ‘junctures’ hold so much potency and power to acknowledge and appreciate within ourselves and also in the way we support our bodies, minds and spirits to transition.

little line with graphic of a bowl of soupMy number #1 Ayurvedic Seasonal Transition tip’s for you depending on which transition you’re currently in (based on where you are in the world) are:

For my Southern Hemisphere friends: Going from Winter to Summer (via Spring), we want to optimise our bodies ability to ‘melt’ excess ‘Kapha’ (Earth + Water elements) in our system that can manifest as heaviness, fluid build up, congestion, swelling and stagnation as the weather gets warmer (if not balanced).

3 Simple Ayurvedic Lifestyle Practices that can support your body in naturally and gently ‘spring cleansing’ in preparation for Summer are;

~ Start incorporating more regular physical movement/exercise into your daily routine (if not already) to support sweating of excess (water + earth elements) via your pores, circulation, oxygenation of your bodies tissues and great blood flow (therefore better natural detoxification). Think: going for a 30-45min brisk walk each morning upon rising, and if possible in the afternoon/evening also to support your bodies ability to ‘melt’ the kapha qualities and get things flowing

~ Enjoy making and sipping on some fresh Ginger tea throughout the day. Ginger is one of the most powerful yet simple ‘herbs’/wholefoods loved in Ayurveda for it’s ability to support opening and flushing the bodies channels, stimulating good circulation, clearing stagnation and supporting our Agni (digestive fire and metabolism) in Ayurveda. Simply boil a tsp of freshly grated ginger in 2 cups of water for 5-10mins on the stove, then lit cool to a comfortable warm drinking temperature, strain and enjoy (or store in a thermos to sip throughout the day!). So yummy, and such a simple way to support the body’s natural ‘spring cleansing’.

~ Focus on eating slightly ‘lighter’ in quality foods (to support your body in ‘melting’ excess ‘Kapha’ build up from winter and be mindful to have less ‘heavy + sweet’ quality foods in your diet. Think: Eating more nourishing healing and simple Soups (…my Sunshine Vegie Soup , Moong Soup or Kitchari recipes are perfect for this if you happen to have my e-book!), more lightly cooked or even juiced greens and fresh herbs (greens are so wonderful for supporting our livers cleansing process via their ‘bitter’ taste and powerful oxygenating nutrients), and minimising ‘white’ foods at this time of the year like ‘dairy, ice cream, wheat breads, heavy coconut products and cold foods as these foods have a naturally ‘building + dampening’ effect with their ‘earth and water’ predominant qualities. Instead of further ‘building’ & ‘dampening’ we want to support ‘melting’, warming and ‘lightening-up’ in spring, so that once summer fully arrives our channels are clear and able to expel the heat of summer with ease, ultimately helping us stay cooler and more balanced come that time! Think of this time of year as your ‘summer preparation’.

Northern Hemisphere friends: Going from Summer into Winter (via Autumn), we want to optimise our bodies ability to release and expel any excess ‘Pitta’ (fire + water) elements in our system that may have built up over Summer and we also want to begin nurturing and balancing ‘Vata’ (air + ether) elements that become more predominant in the environment, and therefore in our own bodies and minds during the Autumn – going into Winter months. Trapped ‘heat’ from summer may manifest as mild inflammation, skin issues/aggravation, digestive upset, feeling agitated and dehydration of the bodies tissues and ‘Vata’ out of balance in may manifest as feeling super ‘spacey’, wavering appetite, dry skin, hair and nails and dehydration also.

3 Simple Ayurvedic Lifestyle Practices that can support your body in naturally and gently ‘autumn cleansing’ in preparation for Winter (with Vata and Pitta being well nurtured and balanced) are;

~ Getting into a practice of daily self-massage with warm organic cold-pressed black sesame oil, coconut oil (if you are in a tropical part of the world) or sweet almond oil. This is one of the most fabulous simple Ayurvedic feel-good daily routines we can gift our beautiful bodies, especially during Autumn to support re-hydration of our precious skin (the largest organ of our bodies!), lymphatic circulation (one of our main detoxification pathways), good circulation (important for nutrients to nourish and oxygenate our cells) and bringing a calming and deeply nurturing quality of ‘warmth’ into our tissues and cells, supporting good ‘Agni’ (digestive fire + metabolism). After a busy ‘summer’ the practice of self-massage, known as ‘Abhyanga’ in Ayurveda is also so grounding and healing for our nervous systems and the mind. To perform self-massage you simply need to get yourself some organic good quality oil, warm it up (I have a new online class, ‘Lifestyle Love’ launching next week that will be available for you on this if you are like me and love to have clear instructions/learn the best tips to make this routine easy!) and then prior to having your morning or evening shower, lovingly massage the oil into your skin starting at your feet and working your way up to your head. After massaging the oil into your gorgeous body, have a warm shower and rinse excess oil off (no need to use soap though), as the ‘warmth’ of the shower will facilitate your pores opening up more, allowing the oil to penetrate deeper into your tissues to work it’s magic, and then dry yourself with a ‘old-towel’, (as your towel will get a bit oily!) and then you’re done. Hydrated, nourished and blissed out…. (Trust me, self-massage feels heavenly and so amazing! Once you do it a few times, you will be in love with it and hooked for life!)

~ Focus on sipping warm water and herbal teas (some of my go-to-favourite herbal teas: ginger/tulsi/dandelion/nettle/green tea) throughout the day (instead of cold/icy water or other drinks) to support your body in gently removing excess ‘Pitta’ from Summer via assisting lymphatic flow and therefore good elimination, re-hydrating your cells and tissues (warm water is known to be far more effective at ‘hydrating’ our body than cold water as with ‘warmth’ our cells open up, whereas with ‘cold’ we contract and close), and as simple as it is, warm water is deeply nervous system relaxing. Again, think of how you feel when you get into a nice warm bath or shower… there’s a sense of ‘opening’ and softening that happens. When we drink warm water we stimulate the same relaxation response and this is also fabulous for helping relieve any build up of ‘gas’ or bloating that can happen easily during Autumn (with the increase in Vata qualities around us in nature and therefore inside of us), and good bowel movements and elimination.

~ Food-wise, Soups & Dhals that are warm and light will be super nourishing and supportive during Autumn’s seasonal transition. During Autumn, our digestive fire can need some extra support (due to Vata’s higher presence making our digestion sometimes erratic). Wholesome and nourishing Soups and Dhals are a great choice, porridge for breakfast, warming stewed apples, berries yummy simple vegies dishes (like my Vegie Subji recipe with homemade chickpea besan flour pancakes and chutney, all recipes that happen to be in my new on-demand online cooking class ‘essential nourishing sides’ launching next week!) – are great simple wholesome meal options that will be super feel good and nourishing during Autumn. Think warming and grounding as your two main ‘food-quality’ focuses during this time of year.

Seasonal transitions are magical portals / opportunities for our body and mind each year…

If you look to nature you will see that most plants and trees go through many changes throughout the year, at each new season… At the start of summer the leaves are generally green, lush, juicy and so ‘fresh’ looking (like the tree’s in my street outside my window right now here), and at the end of Summer, going into Autumn, these same green juicy leaves take on a different hue of natures majestic beauty either shedding completing or turning to a warm golden tone, indicating the tree/plant starting to send it’s energy and resources back ‘inside’ more fully for Winter preparation and internal nourishment, rejuvenation and renewal… To then once again be able to ‘blossom’ in good timing.

We too are the same!

Each season holds so much beauty for us, for our minds, bodies and spirits if we can learn to harmonise and work with the season, with Mother Nature and embody for ourselves whatever it is we need to or feel called and guided to do, for our own smooth transitions and the ability to optimise each seasons magic through feeling grounded, balanced and vital – in harmony inside.

Love & seasonal blessings to you and your loved ones!


x Lorien

Simple One Serve Ayurvedic Veggie Kitchari Recipe (To make the perfect amount for just one bowl!)

Hello beautiful Wholesome Souls!!!

It’s been a few Moons since my last blog post here, and I tell you, it is SO beautiful and exiting – wonderful to be ‘back’ and sharing a super-duper practical and (in my opinion, and that of clients I have worked with over the years!), an essential recipe we ALL need in our Kitchens!

It is easy to make Kitchari for a group of people, there are a bunch of delicious and great recipes in my Ebook, ‘Simple Ayurveda in Your Kitchen’ (which has a lot of other goodies in there to inspire and support your holistic nourishment on a lifestyle level also!), however, they are for making Kitchari for 4 people, not for just 1, which often-times, if you’re single, or just making food for yourself one day, you most certainly need to have up your sleeve to avoid cooking too much (yay, no more leftovers!), and no more wasted food. Food is sacred and precious, and so are our resources and energy, the money we spend on our beautiful organic ingredients and food, SO — I am so excited to introduce to you (and yes, I will slowly bring out more ‘Single Serve’ recipes for you, and a little collection/Ebook focused just on this! Stay tuned for this), as I know you and I both need these ‘Single Serve’ recipes in our life! I got you! :)

For now, I introduce to you, the first of the ‘Single Serve’ Simple Ayurveda Wholesome Recipe collection with you!

Get your beautiful organic goodness and ingredients ready, put your favorite divine Vedic chants or other inspired divine music you love on – light a candle, say a prayer in your Kitchen for blessings of health and nourishment for you and your precious gorgeous body, and enjoy!!!

Before we get ‘into it’, I have some hot ‘One Serve’ Kitchari tips for you, that I think you’ll find helpful! :)

This recipe is for a super simple Ayurvedic One Serve Kitchari with spices, fresh coriander and your choice of seasonal veggies! If you wish to make it plain, without Veggies I recommend adding an extra tablespoon of rice so that it has a bit more substance and body! You can also make this with Whole Moong beans (they just require minimum 8 hours soaking) or Split Red Lentils.

My top Kitchari Veggie recommendations to consider are: Celery, Zucchini, Green Beans, Pumpkin, Carrot or Silverbeet / Spinach.

Simple One Serve Ayurvedic Veggie Kitchari Recipe

(To finally avoid food-wastage, left-overs which aren’t ‘ideal’ according to Ayurveda – for optimal cellular nourishment and digestion — AND, to  make the perfect amount for just one bowl! Yayyy!!!)

Ingredients:

  • 2 tsp of ghee or wholesome oil of choice***
  • 1⁄4 cup of Split Moong lentils or Red lentils soaked for minimum 30mins up to 8 hours and rinsed thoroughly
  • 2.5 tbsp basmati rice (or Quinoa) washed and rinsed 3 times
  • 3⁄4 cup of organic seasonal veggies of your choice (This isn’t hard and fast. Feel free to add a bit more or a bit less if you wish!)
  • 3 cups of ltered boiling water
  • 1⁄2 tsp cumin seeds
  • 1⁄4 tsp coriander seeds
  • 2-3 fennel seeds
  • Teeny tiny pinch of asafoetida (optional!)
  • 1 fresh or dried curry leaf or bay leaf (optional)
  • 1⁄2 tbsp fresh ginger grated or chopped nely
  • 2 tbsp nely chopped red onion or shallots (feel free to not be exact with this! A little more or less will still work well!)
  • 1⁄2 tsp of fresh garlic crushed or nely chopped
  • 1⁄8 tsp of turmeric powder
  • 1⁄8 tsp of quality sea salt
  • A few cracks of black pepper to taste
  • 1⁄4 cup of fresh coriander to garnish
  • A wedge of lemon or lime as a garnish to aid digestion
  • Optional dollop of coconut yoghurt and or homemade date or mango chutney on top as a garnish also!
  • Your love!

*Wholesome oils to choose from if on a Vegan/100% Plant-based Healing diet, (ie: not using Ghee): Cold pressed Sesame oil (for Vata & Kapha), Quality coconut oil (for Pitta) or cold pressed quality avocado oil (Suitable for Vata & Pitta). (If you’re not sure which is best for you and your body, reach out to book a consultation so we can establish a bio-individual set of recommendations specific to you!)

**Extra note for ‘cleansing’: if you feel a lot of heaviness and ‘heat’ in your body, this can mean that your liver is feeling burdened and needs a little break. If this is the case you may nd that sauteeing your spices and ingredients in a splash of filtered water, veggie broth or even celery juice can be a great substitute and allows for a little more lightness.

Creation process:

(Prior to starting the cooking make sure you have your two main ingredients; your soaked and rinsed lentils and also your rice, strained and ready to go in bowls next to your stove to save time and make your cooking process more efficient!)

  1. Take a medium saucepan and place it on your stove over moderate to high heat. Add your Ghee or Wholesome Oil of choice and allow it to ‘melt’ or to simply warm for a moment or two.
  2. Next add your Cumin seeds, Coriander seeds, fennel seeds and stir with a wooden spoon to allow the spices to toast and sizzle for a few seconds. Next add a teeny tiny pinch of asafoetida (optional) and a curry leaf or bay leaf (optional) and stir for another moment.
  3. Add your fresh garlic, ginger and onion and turmeric powder, stir for a few minutes all together and saute until the onion is coated in the turmeric, golden and lightly caramelized.
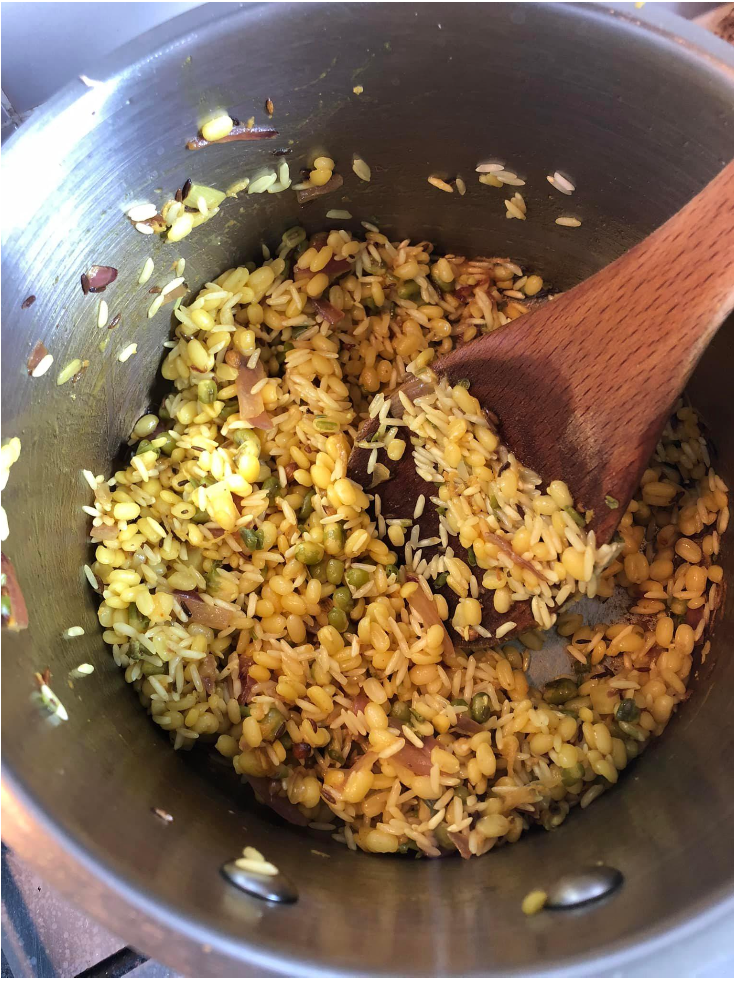
  4. Add your lentils and rice and stir regularly and vigorously for 3-4 minutes until well sauteed with the spices and onion and then add your ltered boiling water and stir to make sure there is no sticking on the bottom of the pot and to combine everything together harmoniously!
  5. Add your Veggies (unless you are only using leafy greens like silverbeet and spinach in which case I recommend adding them towards the end, once your Kitchari is almost fully cooked to avoid over cooking them.)
  6. Add 1⁄8 tsp of sea salt (or a little more to suit your tastes – essentially, a little pinch!), a few cracks of black pepper, your LOVE (of course) and a little handful of freshly chopped coriander and stir through.
  7. Stir and bring to a boil for approx 10-15mins or until your lentils and rice are creamy, smooth and fully cooked. Stir every 5 minutes throughout this process to create a beautiful creamy consistency and to make sure there is no sticking on the bottom. If you see that there is sticking feel free to add a little extra splash or two of boiling water intuitively as you see/feel.
  8. Once creamy and fully cooked, remove your pot of Kitchari goodness from the stove and let sit with a lid on for another 5-10mins to allow the avours to deepen and the Kitchari to settle and become even creamier. This step is optional, if time permits I recommend it though!
  9. Your Kitchari is ready! Serve in your favourite bowl, add a generous garnish of fresh coriander on top, a squeeze of fresh lime or lemon juice to aid digestion and an optional dollop of coconut yogurt and home-made mango chutney (I have an amazing simple, yummy and sugar-free recipe for this that I shall post on the blog for you soon!) – as well as some extra salt and black pepper to taste and enjoy!!!

With immense love, joy, gratitude, blessings and prayers of goodness to you in your Wholesome Kitchen!!!

Aummm Shanti!

x Lorien

Wholesome & Feel-good Spring Lentil Veggie Soup Recipe!

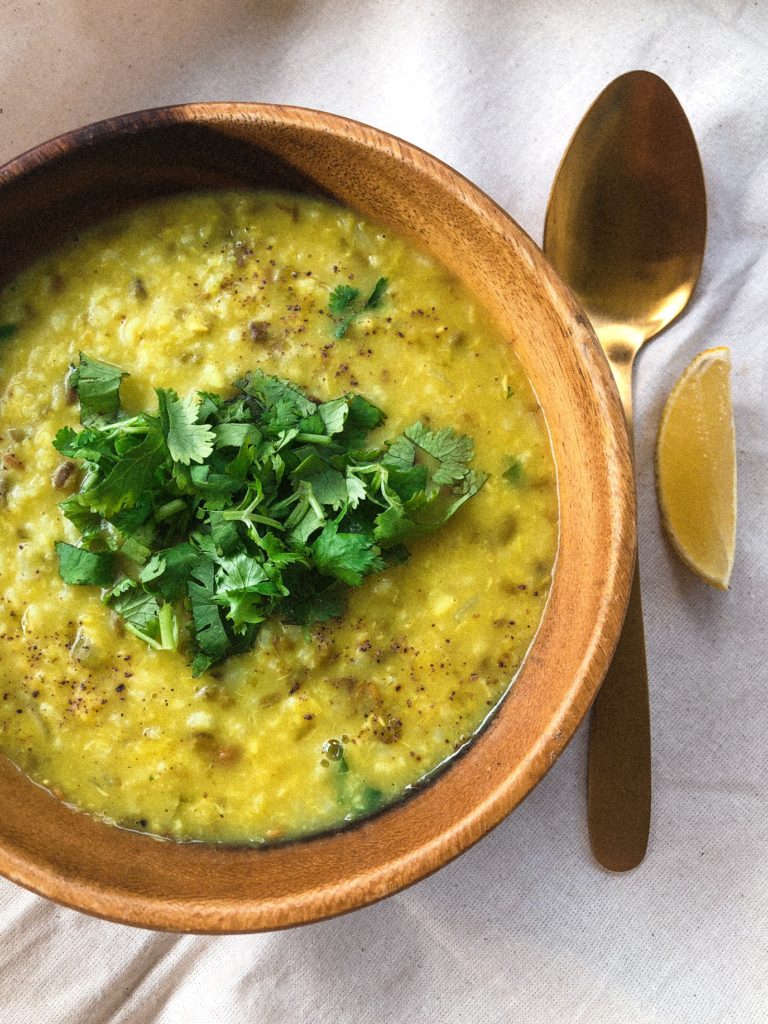
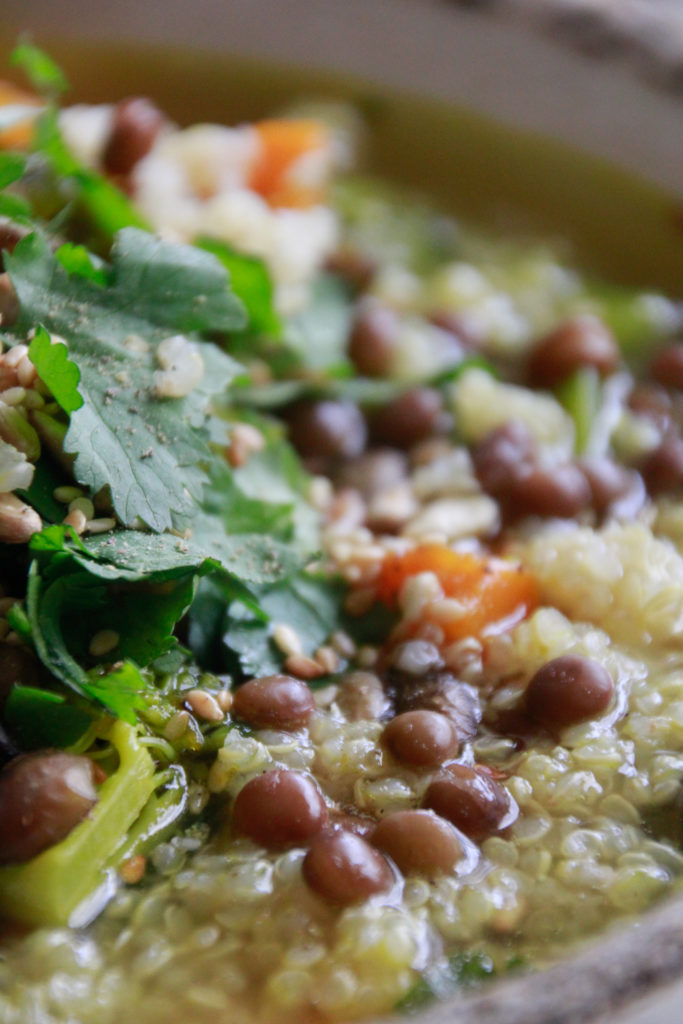
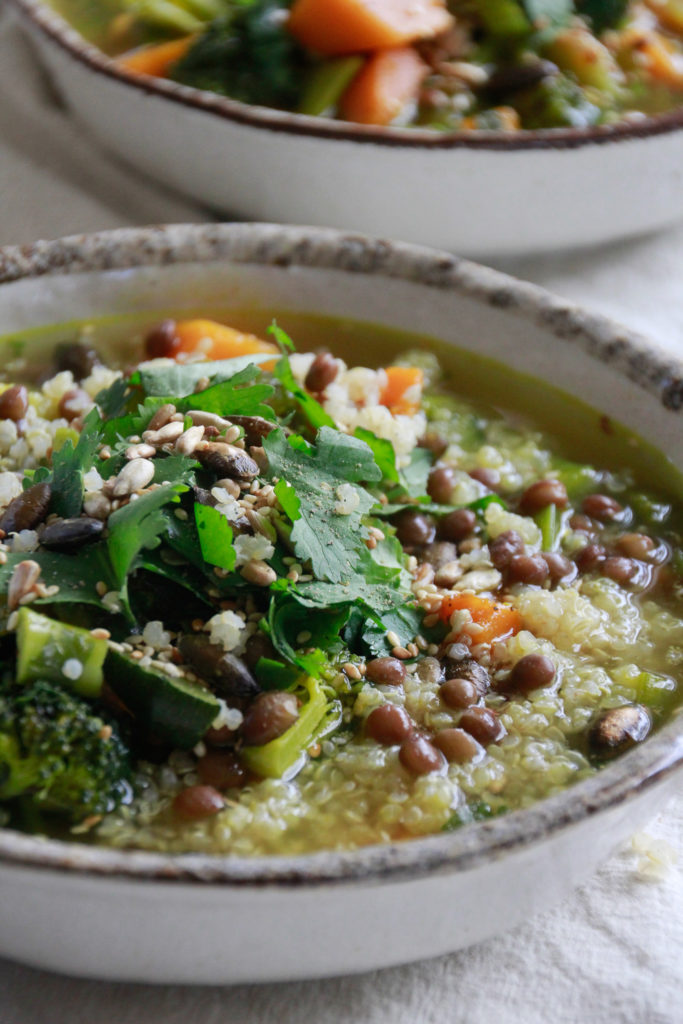
Bowl of wholesome Spring lentil veggie Soup goodness!Ahhhh, it’s Spring – and such a beautiful, lush and refreshing Spring season it has been so far here in Australia right now too!
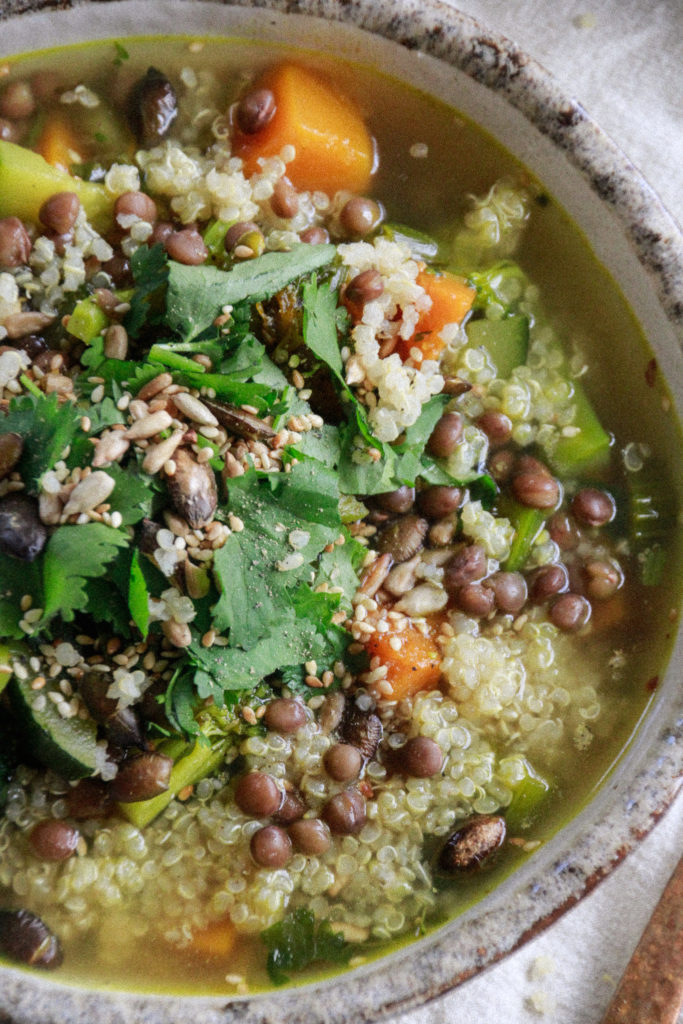
In Ayurveda, seasonal change is considered a magical and potent time of the year for giving extra love and nurturing to our beautiful bodies and from a digestion point of view – to focusing on foods that are ‘light’, ‘warm’ and ‘easy-to digest’, so that our body can devote energy to it’s natural seasonal change processes of cleansing, adjusting and aligning for the next season ahead!

So, when it comes to giving the body a little extra space, energy and warmth-filled-loving goodness to support our digestion and our immune system during seasonal change… the solution is Souper Simple! (I just had to go there! hehe) …If that pun didn’t give it away, the solution is, drumroll, yes you guessed it… Soups! Soups my friend are our Seasonal transition best-friend, and are a beautiful way to incorporate the potent, nourishing and ‘deliciousafying’ qualities of healing Ayurvedic kitchen spices and herbs into our cooking too – for literal added goodness!

In seasonal Soup fashion ~ I have personally been living off Soups in my Kitchen lately, since the seasonal change, making some of my staple go-to healing soup favourites from my E-book, as well as creating some fresh new yummy Soupy-goodness filled recipes and today I am so excited to be sharing one of my favourites at the moment, with you!

The Soupy downlo’ on this fresh new recipe…

If you have my E-book, you’ll see that this recipe is very similar to the ‘Sunshine Veggie Soup’ recipe in there that you are most likely familiar with (I think it is THE most commented upon recipe from the book! It’s popular, and for good reason!) It’s definitely one of my all time favourite go-to’s as it is not only packed with my favourite Vegies, but it literally feels like sunshine in my body when I eat it too, (hence the name!)

This new recipe I have for you today, has all the qualities I love about the ‘Sunshine Veggie Soup Recipe’, with a little extra! The two new main ingredients being; whole red lentils for added protein, fibre and oomph! And, fluffy steamed quinoa for extra protein and heartiness! Yuummm!!! (It’s so good, I’m excited for you to try it!)

The combination of healing Ayurvedic spices, vegies, lentils and quinoa (let alone garnishing with some yummy crunchy toasted seeds – also from my E-book) is…. Let me just say, simply Super (or Souper!)-duper wholesome, nourishing and feel good!  It feels DIVINE in my tummy, and I hope in yours soon too!

This Soup is a ready to go meal all in one, and I feel confident that you are going to LOVE it and fall in love with making it a staple go-to wholesome feel-good Soup recipe in your Kitchen also! Yay!!!!

A few more reasons to love Soup during Seasonal transition (and in life in general!): 

  • Soups are an amazing nourishing staple, they are simple, quick, easy to make and nutrient packed!
  • They are warming, light, high in fiber from Veggies and or lentils/legumes and generally speaking – are easy to digest for the body due to their warm, soft and smooth qualities!!!
  • They are easily customisable and adaptable and are a great meal to make when you’ve only got a few veggies left in the fridge!
  • You can make Soups in advance so that you have a nourishing wholesome meal for lunch or dinner ready to go on days when you’re busy and need something quick!

…Basically, what’s not to LOVE about Soups!!! …I love them SO much!

So, without further adieu, let’s get straight into the Recipe!

little line with graphic of a bowl of soup

Wholesome & Feel-good Spring Lentil Veggie Soup Recipe! 

Wholesome Vegie Lentil Soup Recipe with Ayurvedic Spices and ingredientsIngredients:

  • 3 tbsp of Ghee, Coconut Oil or Avocado Oil
  • 2 tsp of Cumin seeds
  • 1 tsp of Coriander seeds
  • A pinch of fennel seeds
  • 2 tbsp of fresh ginger finely chopped or grated
  • 1 cup of finely chopped red onion (or shallots!)
  • ½ tsp of turmeric powder
  • 1 cup of celery finely chopped
  • 3 cups of small – medium cubed pumpkin
  • 2 cups of zucchini cut into quarters
  • 2 cups of broccoli chopped into little florets (little trees!)
  • Approx 10-12 cracks of black pepper from your pepper grinder!
  • ½ tsp of sea salt
  • 1 cup of fresh coriander finely chopped
  • 1 cup of whole red lentils (ideally soaked overnight, or at least for 1/2 a day prior to cooking!)**
  • 1.5 cups of *cooked* whole Quinoa (white or tri-colour will work perfectly!)
  • Your love! (…Obviously, the *most* important ingredient, always! :)

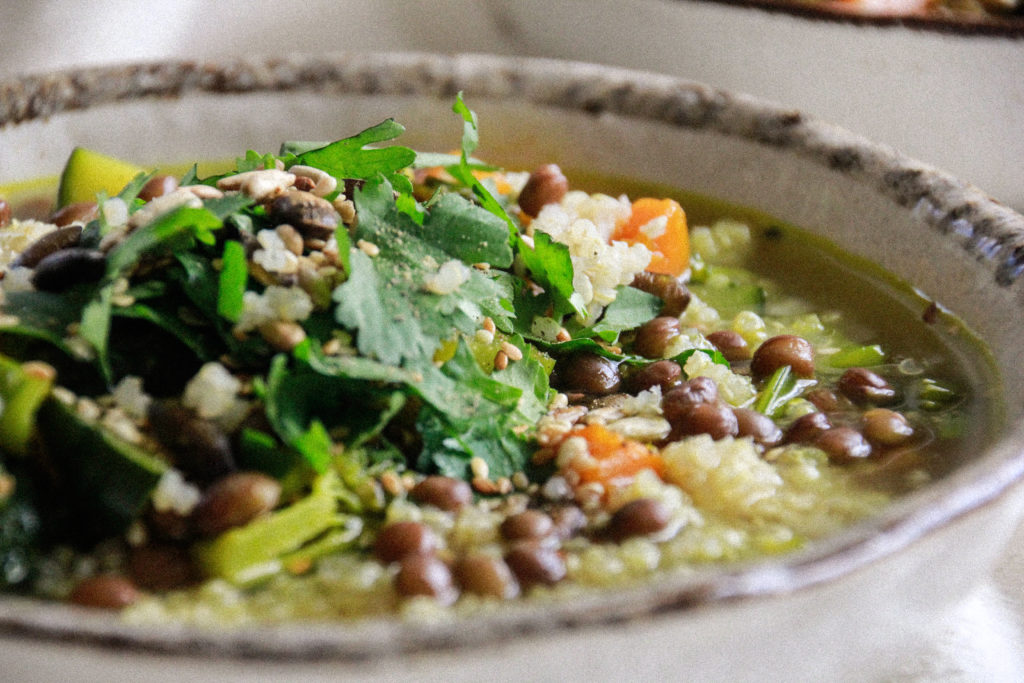
**Note: A common question about the ‘Whole Red Lentils’, in this recipe is ‘Why do they *look* like ‘brown lentils’? The answer is that ‘Whole red lentils’ infact don’t actually look ‘red’ as their name suggests, they look ‘brown’ (like you can see in the photo’s here)!  Also, if you don’t happen to have ‘Whole Red Lentils’ in the pantry as you’re reading this and are wondering what you can swap them for, you can easily use ‘French Green Puy Lentils’ instead and you’ll find they have a similar cooking time so you can follow the exact same steps!

Simple Creation process in 3 Stages:

This dish is simple, however within it’s simplicity, there are 3 key stages of preparation for it then all come together with the click of your fingers that I’m going to walk you through step by step! …There’s preparing the Lentils, preparing the Quinoa and then preparing the Soup herself! (If you already have lentils and quinoa prepared by chance, you can skip right to the bottom to making the core of the Soup straight away!)

Stage 1: Preparing your lentils… (as they require the most preparation!)

The first step and step that requires the most pre-thought and preparation is soaking and cooking the lentils. There are a couple of different ways to do this.

Lentil Cooking Option 1: If you own a pressure cooker (I recently started using an ‘Instant Pot’ pressure cooker for the sole purpose of cooking beans and lentils quickly!) then you can simply soak your lentils overnight or for at least a couple of hours, and then pop them in your pressure cooker with a bay leaf, pinch of salt and pinch of asafoetida and then cook for 10mins! After 10mins, voila, your lentils will be perfecto and ready for the soup!

Lentil Cooking Option 2: If you don’t have a pressure cooker (I didn’t for years also!) then you can cook the lentils on the stove in water for approx 50mins until they are soft, again with a bay leaf, a pinch of salt and a pinch of asafoetida. So, these are the lentil preparation options.

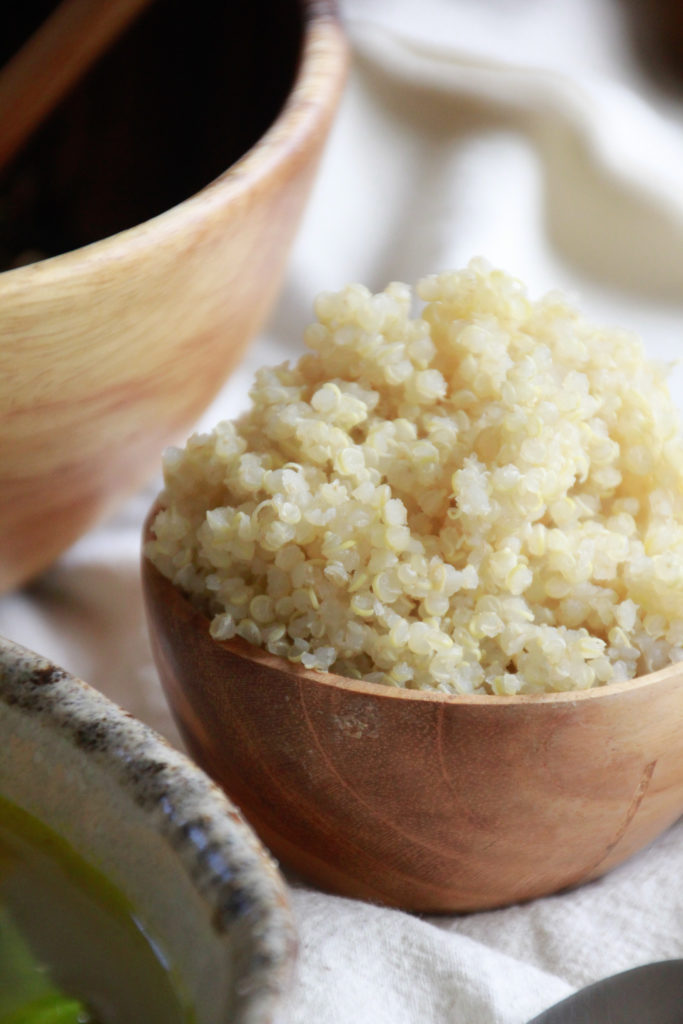
Bowl of Steamed Organic QuinoaStage 2: Preparing your steamed Quinoa

This step is super simple. If you’re familiar with cooking quinoa, then all you’re going to do is cook quinoa the way you know how. If you’re new to cooking beautiful fluffy quinoa then I have some instructions for you below:

How to cook beautiful fluffy Quinoa in 2 easy steps:

Step 1: Take a pot, place 1 cup of quinoa inside the pot, and fill the pot with water to rinse the quinoa and wash it, to help remove the ‘saponins’ that are naturally on the outside of quinoa and make it yummier and easy on the digestive system. Rinse your quinoa in the water a couple of times, use a fine mesh strainer when pouring the water out to prevent losing any little quinoa seeds and then place on the stove.

Step 2: Add 2 cups of filtered boiling water from the kettle (this will just save you a bunch of cooking time!) and a pinch of sea salt, place the lid on the pot and then bring to a boil! Once it comes to a boil, turn the heat down to low and let it cook with the lid still on for 15mins. After 15mins turn the heat of completely and let the quinoa sit with the lid still on (to utilise the steam) for another 5 mins before serving. The result will be beautiful gorgeous fluffy Quinoa! Yum!

Okay, now let’s get onto making the heart and soul of this soup – the warming, healing ~ liquidy Vegie goodness!!!

Wholesome Lentil Vegie Soup Recipe Close UpStage 3: Now, to make the Soup! (this is the quickest part, your Soup will be ready within 20-25mins!)

1. Warm your Ghee or oil in your pot, then add your Cumin seeds, Coriander seeds and fennel seeds. Allow to saute for a few moments until you see the spices release little tiny ‘bubbles’ around them (a sign of them releasing their healing volatile-oil goodness into the pot) and then add your finally chopped garlic, ginger and onion.  Stir and saute for a few minutes to soften the onion and allow the garlic and ginger to become yummy and then add your turmeric powder and continue to saute and stir until the onion is soft and caramelised.

2. Add your celery and stir for a few minutes, allowing the celery to soften and meld with the other ingredients already in the pot. Next, add your pumpkin, and stir for a few minutes to give it a head start before then adding the rest of the vegies. Next add the rest of the vegies; the zucchini and broccoli and stir.  Add your hot water from the kettle, a generous amount of ‘black pepper’ from your pepper grinder (or approx ‘12’ cracks!), sea salt and some fresh coriander. Allow to cook for approx 20mins or until the pumpkin is soft and tender. When the pumpkin is soft, you know your soup is done!

3. Scoop your drained and cooked lentils into the Soup and stir to allow the lentils to merge with the vegies.  And then optional is to add a few spoons of quinoa to your soup (this is really delicious) OR leave the quinoa as a side to enjoy adding to the soup as you eat it, like dipping bread into your soup, but it’s fluffy quinoa instead!

And your Soup is done!!!

Serve with some crunchy toasted seeds, fresh coriander, a little pinch of salt and a few more cracks of black pepper to suit your taste.

Enjoy and relax while eating… put some soft music on in the background, light a candle or two and take a moment to ‘center’ your mind and body before your first bite. When we do this before a meal we are relaxing the nervous system, which in turn relaxes the digestive system. This prepares the body to digest the divine food we are about to bring into our precious body optimally for great digestion and our ultimate Nourishment!

…Yum! Enjoy in bliss and if you make this recipe and love it please let me know on instagram, facebook or even good-old email (lorien@wholesomelovinggoodness.com) ! :) I love hearing from you and seeing your creations! 

With love and joy to your home and family from mine!

Blessed and blissed nourishing!

x Lorien

P.S. If you’re feeling inspired to take your personal inner and outer nourishment and self-care to a whole-new delicious level, you might love my self-paced signature 6-Week Ayurvedic Food & Lifestyle transformation program, ‘Simple Ayurveda in Your Kitchen’!

It’s a juicy course to support you in not only becoming a creative intuitive genius in the Kitchen, with making staple wholesome Ayurvedic dishes for yourself and your family, but to also empower you to implement Ayurveda’s foundational healing wisdom and magic into your modern daily life! The wholesome doors to the program are opening for enrolment again soon, so if you’re ready to take your nourishment to a new level I highly recommend you join the ‘Waiting list’ here so I can let you know when enrollment opens for the last time this year!

Yes please, I’d love to find out more and join the Waiting list!

x

Wholesome vegan lentil veggie soup recipe

Wholesome 7min Carob Easter Truffle Balls Recipe!

It’s Easter 2021!!! Yay!!!

…And, it has been many many moons since my last blog post here!

(To go straight to the recipe, scroll below!)

…The moons we all experienced in 2020, over the last year certainly presented new and challenging situations for humanity, and each one of us to navigate and grow through – as a global family, we are very much still navigating and traversing these challenges and new approaches to how we live and go about our day-to-day lives, and this humble little blog had a little ‘2020’ hiatus of sorts as I navigated the changing world and took time to engage in further study, training and creative ‘offline – time’!

It feels so incredibly good to finally be back to the blog, sharing a fresh wholesome and brand new recipe with you!

And, while this post is actually about this delicious – lush and wholesomely scrumptious new recipe, I couldn’t go ahead and get straight into talking about it, without first saying a proper ‘Hello’ once again and acknowledging how good it feels to be back here, sharing on this humble little page with you.

I also hope this finds YOU and your loved ones well, thriving and finding nourishment in life’s daily magical moments and miracles!

…So, let’s get into this recipe!!!

Lush, chocolatey (though it’s really ‘caroby’), decadent tasting and yet unbelievably simple in both ingredients AND preparation.

If you have been looking for a wholesome, quick, simple, easy and feel-good choccy Easter treat to make for yourself, your friends or your family – look no further! :)

Full disclosure. I came up with this recipe in a hurry, when looking in my pantry and fridge for ingredients that I could make a ‘treat’ out of to bring to a girlfriends place for a Women’s circle I was going to. I had only 10mins before I had to leave the house. I had had a really full day, didn’t have anything pre-prepared and was unsure of what I could pull off in just 10mins – and definitely didn’t want to arrive to this beautiful gathering empty handed!

…What happened next was a foody’ miracle’, (hehe), and – the ‘birth’ of this here recipe!

Dramatic language I know, but I’m honestly so excited about how simple and obvious this lush truffle recipe is that I am actually not afraid of sounding over the top and dramatic about it at all! :)

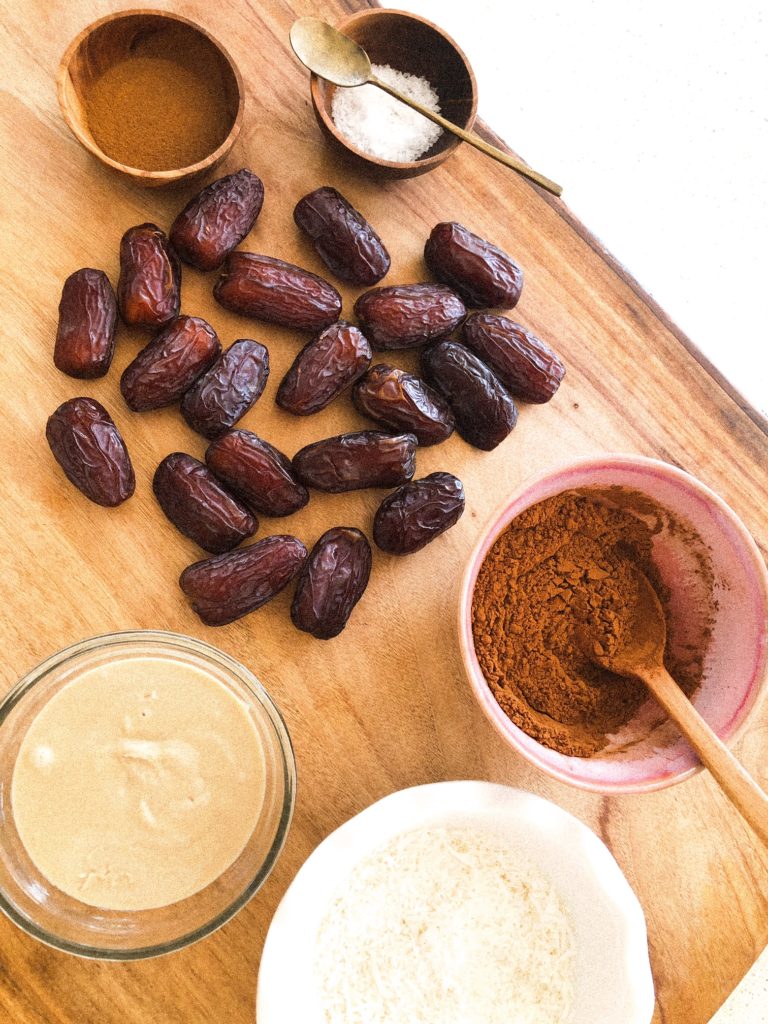
Medjool dates – Tahini – Carob – Cinnamon – Salt AND woman-power (my/your hands!)

With no time to get the food processor out, (and no need as if you’ve ever eaten a Medjool date you will know how soft and sumptuous they are!) I quickly removed the pit’s from my dates, combined these 5 core ingredients together in a bowl, and with clean dry hands proceeded to massage everything in the bowl together, into one luscious datey-caroby-tahine-y clump, and then into a dozen bite sized lush truffle balls to take with me!

The result…. A batch of lush, truffle-like, chocolate-free, sugar-free, no-fuss and super lush and delicious (…every woman at the circle asked for the recipe!) wholesome treats.

Treats that take only 6 ingredients. Require zero food processor (unless you prefer to not get messy with your hands). Can be made in less than 10mins AND, most importantly, that feel sooo lush, you may even say that if they were covered in a chocolate coating they would be a modern day wholesome Ferraro Rocher! (Btw, I’ve tried them covered in home-made raw chocolate, and it is amazing too!)

Without further-adue, let’s get Wholesome Easter Carob Truffle ball rolling!!!

First, a few key tips, before you get ball-making: 

  • Make sure your hands are clean and dry as we are about to combine everything with your hands!  …Yes, no food processor needed, just your beautiful bare hands. …This part is a little messy, however so deliciously fun, tactile, creative-feeling, time saving, dish-saving (yay for not having to clean the food processor after!) and no-fuss!
  • Carob powder like any powder can naturally get a little ‘clumpy’. Before adding your Carob powder, have a look at your powder and if you notice any lumps take the back of your spoon and gently ‘smoosh’ them out, so that your powder will blend and mix seamlessly when you get to mixing and combining everything with your hands! 
  • If you are not into the idea of using your hands to make this mix, (I get it, it’s messy and definitely not everyone’s thing!) you can absolutely use a food processor to do it all instead, and they will still be super delicious and luscious! :)

Wholesome Carob Truffle Balls Recipe!

(Make approx 15 balls!)

Ingredients:

  • 20 Medjool dates (with pits removed)
  • 3 tbsp Hulled Tahini (unhulled will work fine also, but just have a richer/earthier taste!)
  • ¼ tsp Sea Salt or Himalayan Salt
  • 2.5 tbsp Carob powder (you could use Raw Cacao powder instead if you’re not a Carob lover or don’t have any Carob in the pantry!)
  • ½ tsp Cinnamon powder
  • 4 tbsp of desiccated or shredded coconut (for rolling them in at the end!)
  • Your love!

Creation process:

Step 1 – Making the mix:

  1. Remove the pits from the inside of 20 Medjool dates and place the dates in your favourite bowl.
  2. With clean, dry hands, use your hands to ‘massage’, soften and ‘squish’ the dates into one another.
  3. Next add 3 tbsp of Tahini, ¼ tsp of Sea salt, 2.5 tbsp of Carob powder and ½ tsp of Cinnamon powder to your date bowl and begin to combine (this is where it get’s a little rustic and messy, but so fun!) all ingredients together with your hands by massaging the tahini, carob, salt and cinnamon into the dates for 1-2mins or until you feel they are well combined. Put your love into the mix and enjoy this creative, tactile and up-close and personal moment with your delicious ‘truffle ball’ mix! It can feel really therapeutic, stress relieving and like a lovely foody-meditation! :)

Step 2 – Rolling your truffle balls:

  1. Take a small piece of your mix in your hand and roll it into a little ball with the palms of your hands until it is nice and compact, and a beautiful round sphere shape!
  2. To coat the balls in shredded coconut, place your shredded coconut in a small bowl and roll each truffle ball into the coconut until satisfactorily covered! :)
  3. Repeat this final step for each ball and ~ they’re ready to be served!!! Yay!!!

Pro tip: If you have a little more time up your sleeve, place them in the fridge for 10-20mins to let them harden a little before serving. (Doing this gives them a crazy ‘caramel-snickers-bar’ like texture that might really help hit that nostalgic chocolate bar–craving spot! :)

Yay!!

Enjoy!!


“We are not going in circles, we are going upwards. The path is a spiral; we have already climbed many steps.”

~Hermann Hesse


~~~

Wishing you and your loved ones a magical happy Easter and I hope this simple – yet super lush Wholesome Carob truffle treat recipe hits your yum-spot and inspires some relaxed, meditatively-messy hands on fun in the Kitchen these holidays!

And, as Mr.Hesse says in his quote above… Though we are living in some wild and uncertain times, we must have faith that we are ‘not going in circles, but that we are infact going upwards!’ May we keep ourselves nourished and have faith in life and one another’s goodness, always!

With love,

x Lorien

Vegan Savoury Buckwheat Moon Wraps Recipe!

savoury wheat-free buckwheat wraps

The best wheat & bread alternative since… well, before sliced bread!

Organic Whole Foods, filled with innate wisdom and intelligence (for our beautiful bodies) from nature is where it’s at!!!

…One of the hardest things for many to give up and find satisfactory wholesome replacements for when switching to Whole Foods and wanting to clean up their diet is WHEAT and breads and bread-like products made from gluten and wheat.

I totally get it. We are often brought up eating it for breakfast, lunch and often dinner.

Regular (processed wheat, pesticide laden, nutrient devoid) bread has culturally become a staple in the west and sadly is heavily marketed to us by big companies as being highly nutritious, (think ‘wonder white’etc) when the plain, honest real truth is that it is the total opposite. It’s essentially like poison to the body due to the chemical pesticides these grains are grown with as well as the over-agriculturalisation of the grain in general ~ sadly making wheat today devoid of the goodness it once contained in the past that allowed our bodies to recognize and draw nutrients from it.

This literal stripping of goodness that has occurred over the last 100+ years is why so many now experience inflammation, swelling and gluten-intolerance when it comes to eating this major western staple.

So, what ‘bread’ and grain you’re eating is a big area to look into when exploring your health and wanting to heal your body and digestive system. Especially important for anyone currently experiencing high inflammation/join/skin/gut/anxiety issues.

So, this is why I for one am so over the Buckwheat Moon! to share this incredibly simple and easy recipe for making your own home-made wholesome wraps, pancakes, flat bread, roti, chapatis, naan and… whatever else that is flat and bread-like that you wish to find a wholesome alternative for!

Hello Buckwheat. 

Hello Savoury Buckwheat Moon Wraps!

P.S. Even though the name, ‘Buckwheat’, has the word ‘wheat’ in it, I want to ensure you that Buckwheat is not wheat at all, and is 100% gluten-free. Another interesting fact about this amazing wholefood is that while it is used like a grain in cooking, it is actually technically a ‘seed fruit’, not a grain, making anything you make with 100% buckwheat, not only wheat-free, but also ‘grain-free’. 


Vegan Savoury Buckwheat Moon Wraps Recipe:

(This recipe will make approximately 6 x large, thin wraps.)

Ingredients:

  • 2 x cups of Organic Buckwheat flour
  • 4 x cups of room temperature filtered/spring water
  • 1/2 a tbsp of Organic Potato Starch
  • 1/2 a tbsp of Organic Tapioca Flour
  • a pinch of sea salt
  • some organic coconut oil for seasoning your pan
  • of course, the most important ingredient, your love!

To Make Your Wrap Mix:

  1. Place Buckwheat flour in a medium mixing bowl and make sure you smooth out any lumps with the back of a wooden spoon or through sifting, (so your mix is nice and smooth).
  2. Next add the Potato starch, Tapioca flour and salt. Mix these into the buckwheat flour until well combined. 
  3. Slowly begin to add water, stirring slowly to gradually mix the liquid in with the flour. Mix until water and flour is well combined and forms  a smooth, runny, fall of the spoon consistency! 

Cooking your Wraps: 

  1. Warm a healthy non stick pan, and add a dash of coconut oil to help the cooking process.
  2. Using a ladel, pour a spoonful of your mix into you pan and quickly lift the pan of the heat to move it around, ’spreading’ the wrap mix around the pan to ensure it is thin and a nice big circle!
  3. Cook on one side until little air pockets show through from underneath, then using a spatula, flip to cook the other side for 2-3 minutes or until looking cooked.

That’s it. So SIMPLE!

You now have a beautiful, soft, digestive friendly, nourishing and wholesome Buckwheat moon wrap to enjoy immediately or to store in an air tight container for making lunches the next day! :)

The key to making a good wrap that you can put tasty delicious fillings into is to make it thin, flexible and supple (i.e.: unbreakable once goodies are inside)!

You’re in luck as with the recipe above, I’ve done the work of ensuring your mix is ‘unbreakable’ for you, so you can relax and simply enjoy some super versatile, wholesome, buckwheat wrap love in your life!


Making a thicker / Roti / Naan like bread from your Wrap mix:

The key to making your buckwheat moon wraps into more of a roti / naan like bread to go with soups and curries is to add slightly less water to your mix, so that the ‘wraps’ are  thicker. To do this I recommend:

  • Experimenting with using only 3 cups of water, rather than 4
  • Adding slightly more coconut oil (or ghee) to your pan while cooking them, to get them more toasty and buttery
  • To get some ‘air’ into the wraps, giving it a flakey/more roti like consistency, press your spatula onto the already cooked face up side of your wrap (once you’ve flipped it once) while cooking to encourage air bubbles and pockes to move around, helping make it more ‘bready’ and crispy.

wheat-free. gluten-free savoury buckwheat wraps. the best thing since before sliced bread!

…I’ve been a Buckwheat lover my whole life, (forever thankful to my awesome alternate, wholesome-nutritionist Mum!) So, as you can imagine, making buckwheat pancakes has been something I’ve loved doing forever.

Lately, while doing some kitchen experimentation (…which is ALWAYS happening, as I just love exploring new ways of doing things and new wholesome tastes, flavours and solutions for good nutrition) I stumbled upon this wrap mix/concept. Needless to say (from everything you’ve now read above), I got a bit excited about this development, and in particular, about how versatile something so simple, nourishing and wholesome like this can be, esspecially for families with making school lunches etc!

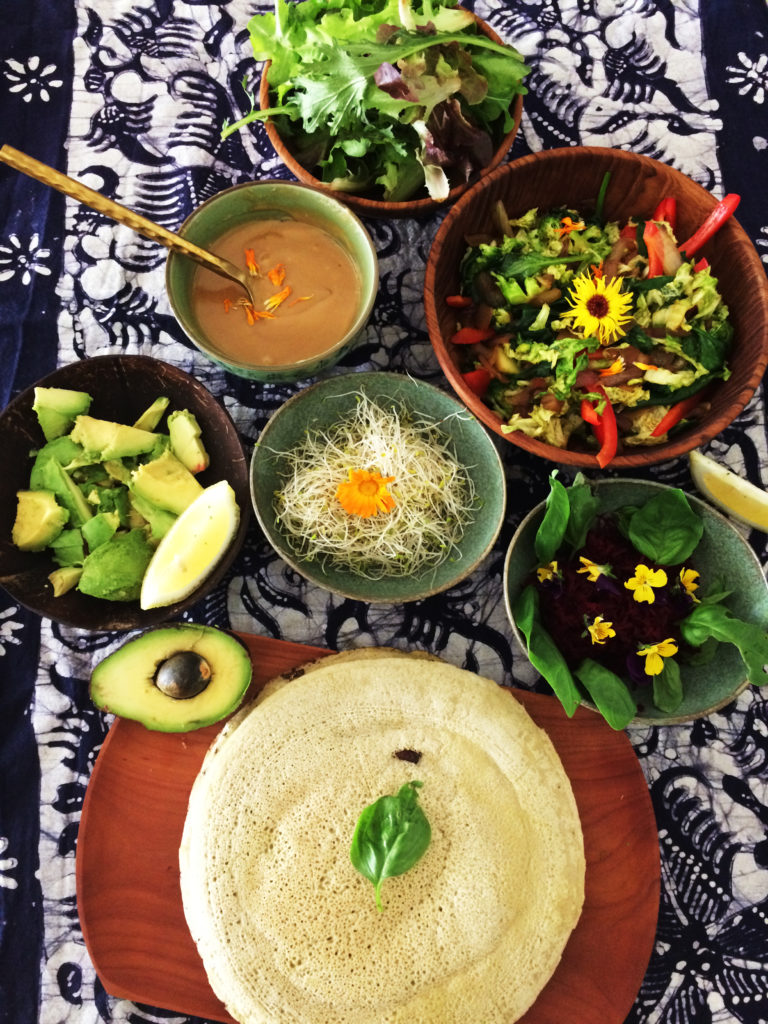
During one of my morning buckwheat feasts the wrap was born, and the photo above shows you the ingredients I prepared to go inside the wrap. The filling.

You can put anything you like inside a wrap obviously, it is a blank canvas for your nourishing tasty pleasure…

Incase you want to know what I put in (which tasted great!) I will list the items here for you to give you some inspiration!

  • fresh avocado with lemon juice 
  • fresh alfalfa sprouts (so yum!)
  • finely grated beetroot and fresh basil from the garden (herbs are excellent and add ‘wow’ factor!
  • fresh organic leafy green leaves
  • home-made sesame tahini dressing/sauce (tamari, toasted sesame oil, lemon juice, dash of maple!)
  • sauteed asian greens + vege (red onion, ginger, garlic, turmeric, wombok cabbage, silverbeet, red capsicum, brocolli) 

I hope this recipe brings you and your family endless wholesome Buckwheat Wrap love and joy! 

If you try it and love it, please let me know and help spread the word by sharing with others who may appreciate having this simple, delicious, wheat-free wrap goodness in their lives also!


With love & warmest gratitude,


x Lorien


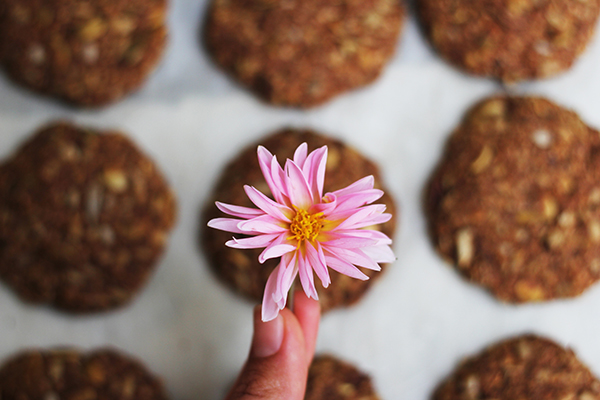
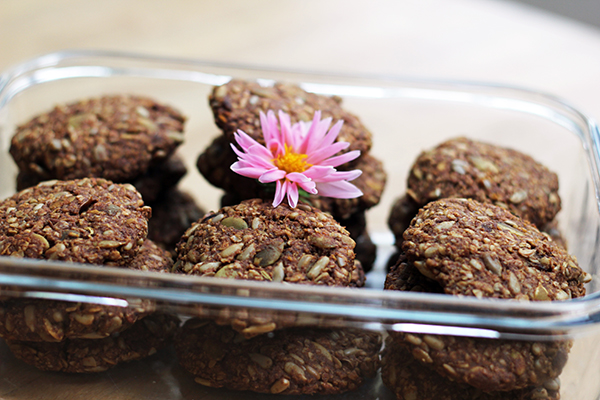
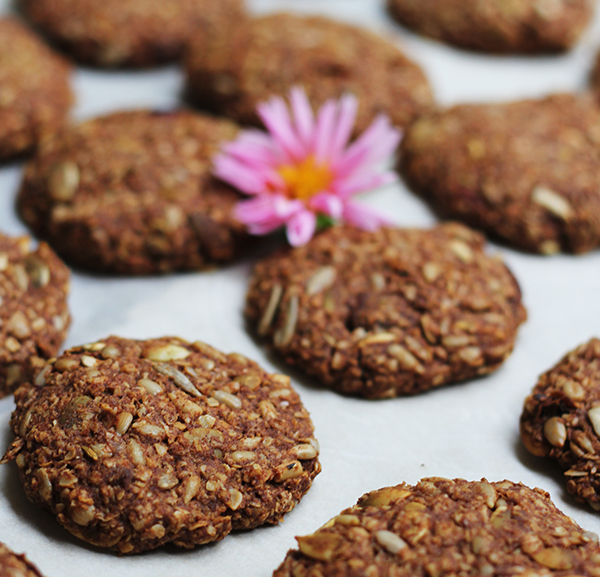
Ayurvedic Cookies – Heavenly Muesli-Crunch Cookies (Sugar-free!)

Organic Home-made Sugar-free Muesli Crunch Cookies!

This recipe has been blowing my mind and deeply exciting my tastebuds and senses since I first made and intuitively put together a batch of these delicious cookies a week ago!

They are super simple, require no processed sweetener (not even beloved maple!). They are a great wholesome treat to have on hand for afternoon tea, a snack at work, the kid’s lunchbox’s and or any other excuse you can make in your day to open the cookie jar and sit down with one of these amazing treats in your mouth!

…Okay, enough cookie-talk, let’s get to the cookie-cooking!

wholesome ayurvedic sugar free cookie recipe!

Wholesome Ayurvedic

Heavenly Muesli-Crunch Cookies!

(sugar-free, nut-free, gluten-free*, vegan friendly)

Ingredients:

  • 2.5 cups of organic oats*
  • 1 cup of organic sunflower seeds
  • 1 cup of organic pumpkin seeds
  • 4 tablespoons of organic cinnamon powder
  • 2 tablespoons of organic cardamon powder (or seeds)
  • 1 tsp of fennel seeds 
  • 1/2 tsp of fine organic sea salt
  • 200ml of home-made organic melted ghee or coconut oil
  • 20 organic dried ‘desert’ dates soaked, de-pitted and mashed into a puree or blended. 
  • 1 tsp of organic pure vanilla essence
  • your love! 

* Note: If you are celiac, use ‘gluten-free un-contaminated oats‘.

Creation process:

**Pre-heat your oven to 175 degrees Celsius for 20 minutes while you prepare your cookie mix.

  1. Place all dry ingredients; oats, sunflower seeds, pumpkin seeds, cinnamon powder, cardamon powder & sea salt into a large mixing bowl.
  2. Prepare your dates: take the pits out of the dates and place dates in a medium bowl. Cover dates in hot water and let soften for 3-4 minutes. Once dates are soft, remove the water and mash with a fork or blend in a food processor to make a date puree. (It’s ok to leave some chunks!) Add the date puree to the dry mix of oats and seeds.
  3. Now melt your ghee or coconut oil and stir into the dry mix with the dates.
  4. Add vanilla essence and stir with a wooden spoon or clean hands until the wet and dry ingredients have mixed well together and your happy with the consistency.
  5. Take some melted ghee or coconut oil and oil your baking tray or use a sheet of baking paper.
  6. Take a small piece of cookie mix and roll into a ball in your hands then flatten with the palms of your hand to create a circular cookie shape.
  7. Place your tray of cookies in the oven and bake for approx 30 minutes or until golden brown.
  8. Take them out once they’re done and let them cool before stacking them in your favourite cookie jar or container!

Voila! Your cookies are now ready for your nourishing pleasure! Yum!! :) 

If you loved this recipe – share the love by sharing the recipe link below with your friends via facebook! 

Happy wholesome cookie munching friends!

x Lorien

Organic Ayurvedic Sugar free Muesli Crunch Cookies!

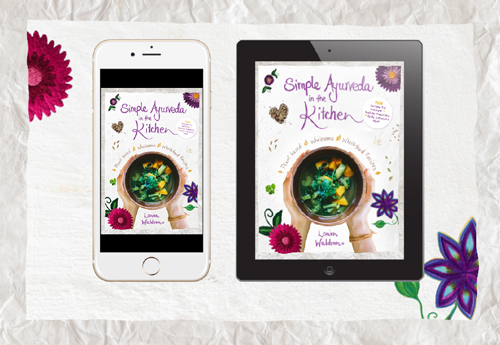
Simple Ayurveda in the Kitchen E-book is here!!

Simple Ayurveda in the Kitchen ebook by Lorien Waldron available now!

Special Announcement & Hooray!!!

Today’s the day I have been dreaming about, since beginning to write this e-book 3 and a half years ago. 

20140116_Trade 16 Part 2_1457

I am beyond excited to finally be able to share the beauty of Simple Ayurveda in the Kitchen with you, no matter where in the world you are. 

Screen Shot 2016-03-12 at 3.01.41 am

This book is a practical guide to living in balance and in harmony with your true nature, based on the wise and practical science & art of Ayurvedic Medicine, organic whole food nutrition & my own life experience of  practically applying this way of wholesome nourished living with ease.

It’s all about being empowered, confident & creative in the Kitchen! 

There are 108 pages of colour, inspiration, empowerment and support to guide you and be a wholesome friend in your kitchen!  

ipad-and-iphone{Click to find out more!} 

img3

These staple recipes will nourish you, inspire you, and be a foundation for your cooking legacy.

images

…I’m so excited, and grateful for the opportunity in life to put this bundle of love and goodness together for you – it’s a dream come true! 

With love,

x Lorien 

20140116_Trade 16 Part 2_1539

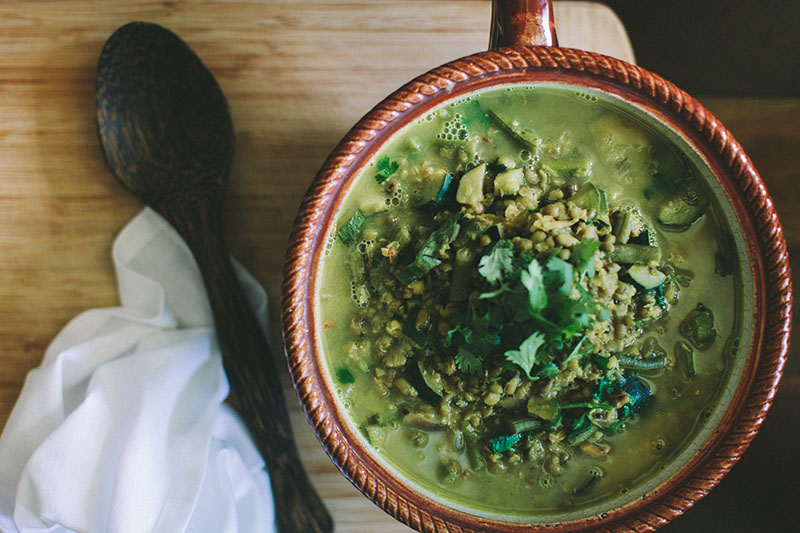
I am clear – Ayurvedic Moong Bean Soup Recipe

During my last trip to India I literally lived off Moong Bean soup! It was the staple meal served during my pancha-karma (ayurveda cleanse of the entire body) and even though it is virtually all I ate for two weeks, I still loved it. Yep, every single mouthful, even after 2 weeks!

This recipe has vegetables in it however you can also make this soup with no veggies – as a super simple cleansing soup that is perfect for recovering from illness, resetting your digestive fire (agni) and getting your inner flame burning bright once again.

Moong bean soup blog post recipe

{Recipe from my recipe eBook coming soon!} 

Ingredients: 

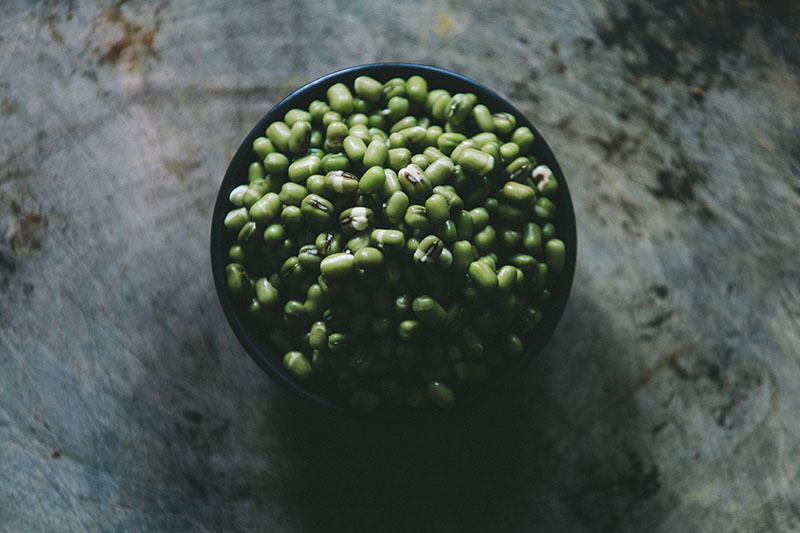
*Soak moon beans over night then rinse before cooking.

  • 2 cup whole moong beans
  • 1 tbsp ghee or coconut oil
  • 2 tsp cumin seeds
  • 1 tsp coriander seeds
  • Pinch of fennel seeds
  • 1 tsp fresh ginger, finely chopped
  • 1 small red onion
  • 1 clove fresh garlic
  • 1 tsp turmeric powder
  • 1 cup chopped green beans
  • 1 cup chopped zucchini
  • 1 tsp sea salt
  • A few cracks of black pepper
  • 1 cup fresh coriander, finely chopped
  • 2 litre’s of boiling water from the kettle

Creation process:

  1. Warm ghee or coconut oil in your pot and add dry spices; cumin, coriander and fennel seeds. Stir to lightly to toast the spices for 2-3 minutes until they start to sizzle.
  2. Add fresh ginger, onion, garlic and turmeric powder. Sauté for 2-3 minutes until the onion becomes soft.
  3. Add soaked moong beans, freshly chopped green beans and zucchini. Stir for 3-5 minutes to sauté the moong beans and vegetables with the spices.
  4. Add 2 litres of boiling water from the kettle, 1 tsp of sea salt, a few cracks of black pepper and a handful of fresh coriander. Place the lid on and boil for 10 minutes then turn the heat down and simmer for 15 minutes until moong beans and vegetables are soft. Serve with a garnish of fresh coriander and a few cracks of black pepper.

Whole Moong Beans- Blog post small

photography: Shantanu Starick 

Yum, yum yum! 

The possibilities of what you can make with Moon beans are endless…

May this soup recipe inspire you in the kitchen and nourish you from the inside out!

 Eat soup and shine and your light in the world! 

x Love, Lorien 

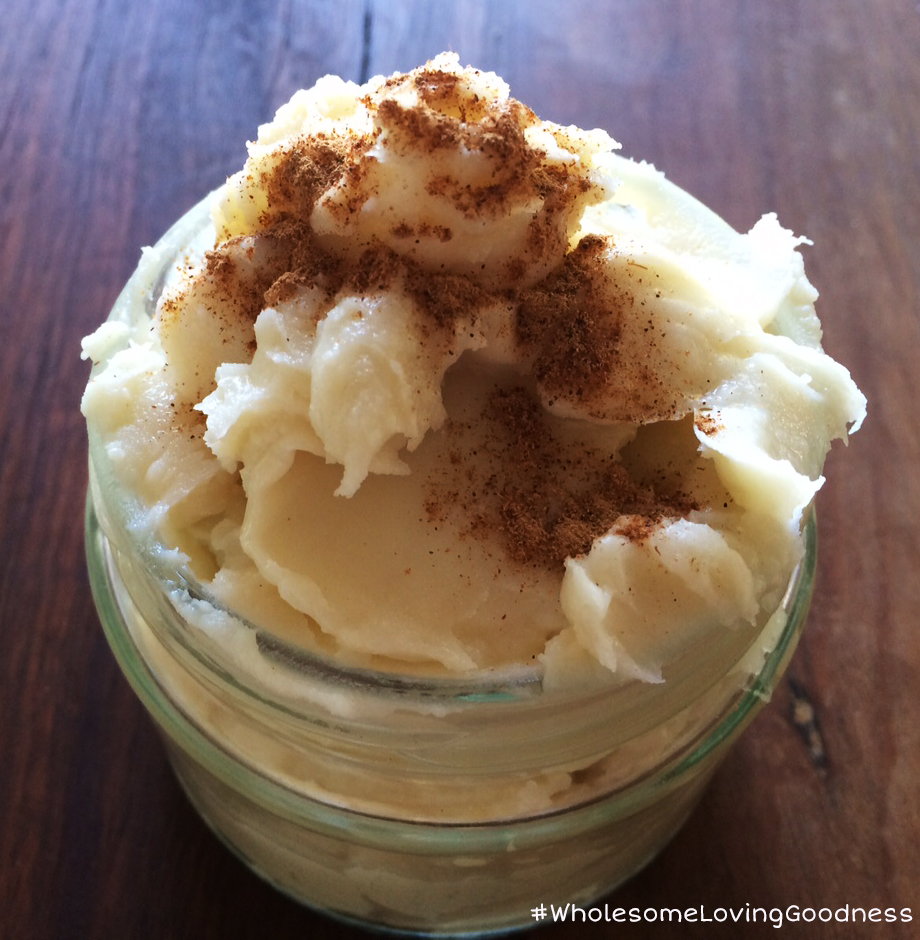
Luscious DIY Organic Vanilla Body Butter!!!

BODY-BUTTER


It’s summer and that means season of beaching ~ bathing and ‘balming’ is here!

During the summer months our skin is moist from the humidity in the air, yet it can still be easily dehydrated due to spending time outdoors, in the elements, in the sun and in the salty ocean.

It’s important to feed the skin as much as you feed your body – as the days have been gradually getting warmer my skin has been cravings some solid hydration, moisturization & nourishment!

Organic is always my number #1 priority when I look for a body moisturiser or body butter.

I love using the Miessence Intensive Body Cream along with a good yummy body butter, I enjoy using them both at different times of the week depending on how my skin is feeling and what mood I’m in.

I have only ever found one body butter that is organic that I have loved and sadly it is only sold in one shop miles and miles away from where I live and the postage to order some was through the roof – so out of hydration/body butter desperation I finally  got the motivation to pull out the raw ingredients I’ve had at home and whip up my own wholesome yummy body-liscious (practically edible) body butter delight which happened to turn out amazing!!!

It is so much fun making your own goodies from scratch. It’s empowering to know that you can provide the body butter nourishment through using your own two hands when thats what your body wants and needs.

I’ve been loving this yummy treat – here is the recipe for you to have a play with at home!

 ‘Body-liscious DIY Vanilla Body Butter’ Recipe

Ingredients:

  • Shea butter
  • Sunflower oil
  • Coconut oil
  • Food grade vanilla extract
  • Your love (of course!)

Creation Process:

  1. Melt approx 200g raw Shea butter in a bowl over a pot of boiling water.
  2. Add: 1tbsp of coconut oil, 2tbsp of Sunflower oil & 15 drops of edible liquid vanilla.
  3. Mix melted ingredients together until smooth and even then let sit to cool.
  4. Once cooled check the consistency of the butter and give another little whisk or mix with a spoon to whip it up a little.
  5. Scoop it into a clean jar and sprinkle with cinnamon (for fun!)

Massage it into your beautiful body and lap up the lusciousness of this yummy simple ~ body loving creation!!

Yum, yum, yummm!!!

Let me know how this turned out!

Take a pic and tag #WholesomeLovingGoodness so I can see your beautiful creations! :)

Summery, balmy, body luscious love!

x Lorien 

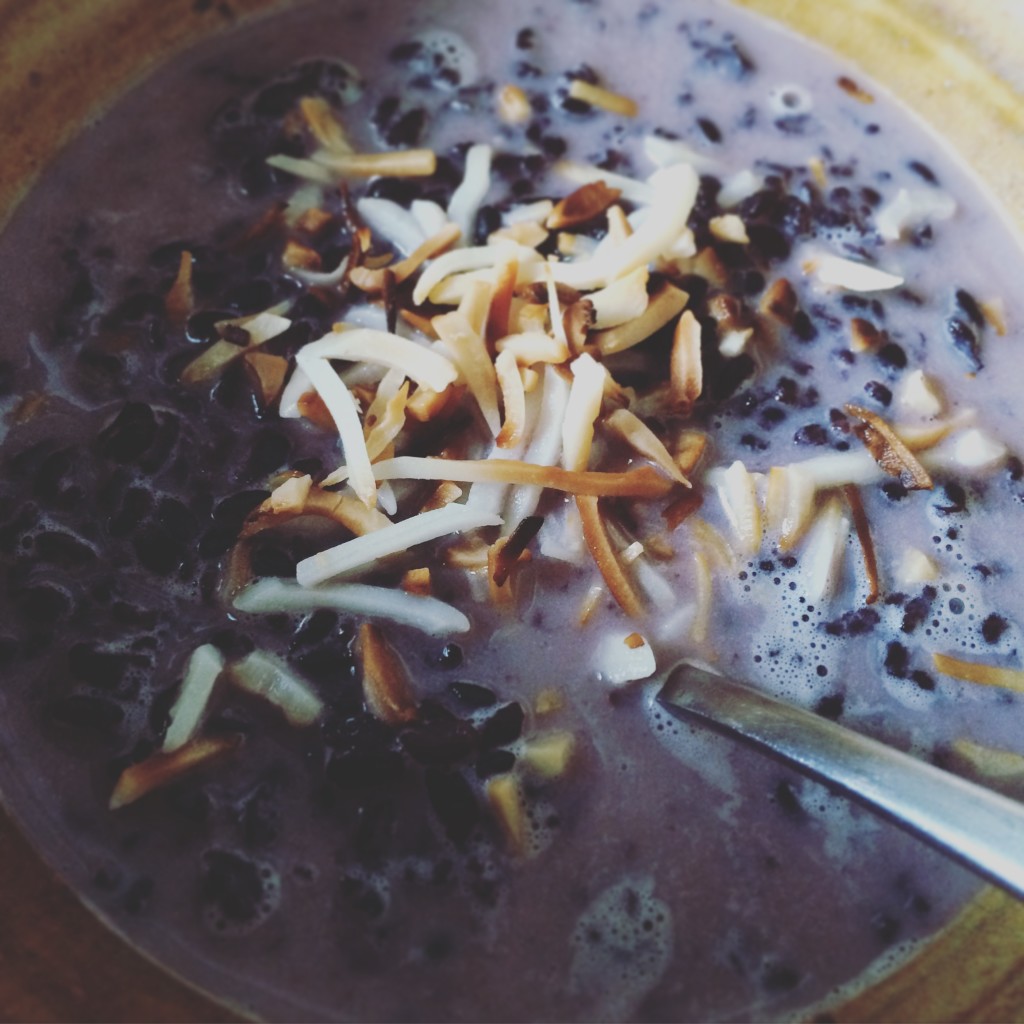
Feeling Tropical! Vegan Black Rice Porridge Recipe

Vegan Black Rice Pudding Recipe - Organic Wholefood Ayurvedic Cooking Vegetarian

H E L L O ~ D E L I C I O U S N E S S !

My aaaaalllllll time favourite food while growing up was this – (apart from its fruity counterpart: fresh papaya!)

I was first introduced to this nourishing, exotic, delectable pudding while on holidays in Indonesia with my mum. I also grew up close to an authentic Indonesian restaurant called ‘Masakan Indonesia’ on the Gold Coast ~ my love for black rice pudding was sustained between our family trips to bali and our family dinners at Masakan. :) Such happy , yummy memories! I’m smiling just contemplating those precious black rice days!

Mum and I made it at home also ~ as with anything delicious, it is fun to explore making it for yourself and this also adds to being able to appreciate the subtlety and elegance that chefs go through in order to master their recipes. I loved the ones we made at home and I loved the ones we ate either in Bali or at Masakan.

I recently discovered ORGANIC black rice for sale at my local health food shop. Excitement! :) One of the reasons I had not made my black rice pudding in a while was because I could only find black rice at specific exotic asian grocery stores – and this was not always convenient to find and I really do prefer to eat organic whole foods for optimum nutrition and care of myself and planet, so buying the non-organic heavily transported type turned me off a bit.

The second reason I stopped buying or making black rice pudding is because the bought ones in restaurants often have loads of sugar in them (as delicious as they are!). This turns me off. I have a new respect and awareness of sugar these days since reading ‘Sweet Poison’ by David Gillespie (great easy read!) and also since studying nutrition and the way food affects our immune system, mental functioning and emotions. Black rice tastes so good with sugar – these days I like to use WHOLE-FOOD sweeteners as much as possible.

My Favourite Wholefood Sweeteners:

  • Medjool dates
  • Maple Syrup
  • Carob 
  • Honey (not for baking or cooking)

If I’m ever going to use sugar I will choose the most ‘whole’ form I can get such as coconut sugar, rapadura sugar or jaggery. In my ayurvedic studies I learnt that these whole forms of sugar can be good for the body and this is true – at certain times and in certain instances, some whole sugar can be medicine. On the whole though – for me personally I feel cleaner, clearer and have more energy when I keep to my natural WHOLE FOOD sweetness listed above as even though whole-sugars still have minerals intact, they can still affect the body in a similar way to regular processed sugar as if you think about it – they are still concentrated condensed crystals of energy. It is easy to be addicted to sugar these days so I choose to get myself hooked on more sober tastes and flavours when I want a sweet hit and the list mentioned above generally always does the trick! :)

Organic Sugar-free Black Rice Pudding is now well and truly back on the menu in my kitchen! :)

If you feel like having some tropical ‘Indonesian’ black-rice pudding fun at home, here is my sugar-free + vegan black rice recipe for you to have a play with! :)

Wholesome Vegan Coconut Black Rice Pudding Recipe

Ingredients: 

  • 1 cup organic black rice
  • 3 cups of boiling water
  • 1 tsp of cinnamon
  • 1 tsp maple syrup (optional)
  • 2 cups of coconut milk
  • shredded coconut (to toast and add as a garnish!)

Creation process:

  1. Rinse your black rice and boil the kettle (it’s always good to give your grains a rinse prior to cooking).
  2. Place your rice in your pot and add approx 3 cups of  boiling water to steam the rice.
  3. Bring to a boil and place the lid on. Cook until the rice is soft and the water has absorbed.
  4. Remove from the heat once steamed and add 2 cups of coconut milk, a dash of maple syrup, 2 tsp’s of cinnamon and your love!
  5. Serve your pudding warm in your favourite bowls and garnish with some fresh banana, papaya, toasted coconut and or a few cheeky raisins.

Voila! So easy, black rice pudding in a flash with whole food ingredients to make this sweety treaty nourishing and delicious! :)

Happy creating in the kitchen! 

Love,

x Lorien