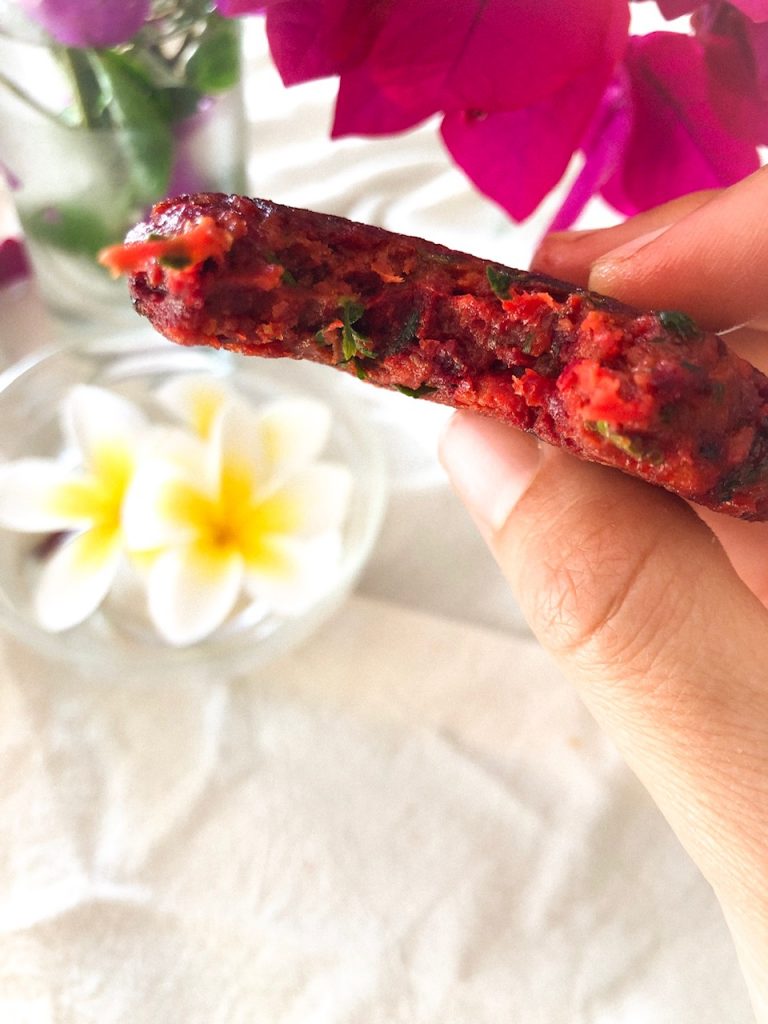
Wholesome & Easy Ayurvedic Beetroot Garden Vegie Patties Recipe!

Gluten Free Ayurvedic Beetroot Protein Patties Recipe

A quick and wholesome lunch, simple dinner, savoury hearty breakfast or an on-the-go wholesome snack / plant-based meat-free alternative to bring to your next family event or Aussie bbq!

These delicious morsels of love are one of the MOST exciting, simple and yummy vegie-licious wholesome recipe creations to be born out of the Wholesome Kitchen!

I first developed this recipe for one of my clients who came to see me for holistic Ayurvedic Wholefood nutrition support for a series of health challenges he was experiencing. He needed a recipe that was quick and easy to make (as he travels a lot, is busy and ussually is just cooking for one), nourishing and nutrient dense, gluten-free, dairy-free, egg-free, nut-free and that was something he could eat that had ‘texture’ so he had the experience of biting into something, along with enjoying the delicious soupy Kitchari’s and Soups that I gave him to have also.

…The result, HE LOVED them, and so did I! 

These patties hit the ‘Pattie spot!’ (if that’s even a thing!), and when you try them at home also, I think you’ll find they hit your ‘Pattie spot’ also! (…Please do email me to let me know!)

Since this recipe came into being I have made it a personal staple in my weekly Meal planning and have enjoyed these beauties for Breakfast, Lunch and Dinner at various times throughout a week!

I recommend serving these Patties with some fresh organic leafy greens dressed with a little olive oil and lemon or apple cider vinegar. So yum!

These Patties can also be enjoyed as something ‘substantial’ with a light evening soup or with a little chutney as a yummy tasty snack!

As this recipe takes less than 15 minutes to make for one person (as a quick ‘what should I take for lunch today’ meal! …don’t worry, we all have those moments!) I have written this recipe to be the perfect amount for ONE single person to make, with no excess/no wastage and so it’s something you can easily follow for making yourself  a quick meal when needed!

If you wish to make a larger batch for an event, a gathering, for the week and or for the whole family, you can simple double, triple or quadrouple the quantities to make it suit your desired situation and how many you wish to cook!

So, without further adue… here is the recipe for the worlds most divine, mourish, tasty, wholesome, Ayurvedically dosed in digestive loving spice and harmonious food combining qualities (…I know it’s bold, but I’m going to just go ahead and claim that these are the worlds best, because to me, they ARE!)

Enjoy my loves and please let me know how you go by coming to say hello to me over on my instagram!

Meat-free Ayurvedic Plant-based Beetroot Vegie Pattie Recipe

Wholesome Ayurvedic Beetroot Garden Vegie Patties Recipe

(Gluten-free, dairy-free, egg-free, nut-free, sugar-free… totally delicious though!) 

Serves 1 person (this recipe makes 6 small yummy patties!) 

Ingredients:

  • 1 medium organic beetroot grated
  • 1 medium organic carrot grated
  • 1 medium organic zucchini grated
  • 1 small red onion finely chopped (optional if onion doesn’t agree with you!)
  • 1/2 cup of besan flour (chickpea flour)
  • 1/4 tsp of turmeric powder
  • 1/2 tsp of cumin powder
  • 1/2 tsp of coriander powder
  • 1/8 tsp of ajwain seeds (you can find these at asian/indian grocery stores)
  • 1/8 tsp of fennel seeds
  • 1/2 tsp of himalayn salt
  • a few cracks of black pepper
  • 2 tbsp of Coconut oil or Ghee for cooking

Creation Process:

  1. Add your grated beetroot, carrot and zuchini to a medium mixing bowl and mix them into each other using your hands so the three of them are well combined.
  2. Add your red onion, turmeric powder, cumin powder, coriander powder, ajwain seeds, fennel seeds, salt and pepper and mix through.
  3. Slowly add your besan flour (chickpea flour), stirring as you add it so that any clumps in the flour get broken up and properly integrated into the mix. Once all of the flour has been added, use your hands to ‘massage’ the mix, squeezing the mix inbetween your hands to allow the naturally occuring ‘water content’ of the vegies to form a nice ‘batter’ with the flour.
  4. Once it’s all well mixed, juicy and a good ‘Pattie’ forming consistency, you are ready to form your patties so they can be cooked. To ensure the patties stay together and form a nice shape that you’d want to eat, I recommend taking a small-medium amount of the mix and forming a ball with it in your right hand, then transfering it back to your left hand, and back again until its a nice well firmed morsel. Then to make it ‘Pattie-ish’ gently use your hands to press the pattie ball into a flatter shape suitable for cooking! You are now ready to cook the patties! Yay!
  5. To cook, allow your healthy non-stick pan** to warm for 2-3 minutes with a little coconut oil or ghee on the pans surface. Once it is warm, place your patties one by one on the pan and allow them to cook for 4-5 minutes before carefully flipping them over with a spatula to cook the reverse side.

**(If you’re looking for a good healthy non-stick pan, the one I use is the Pancake/Crepe pan by Neo-flam, I’m not paid to say this, I’m just a big fan so want to share the good pan love!)

And that’s it! You did it!!

You made the worlds best, Wholesome Ayurvedic Beetroot Garden Vegie Patties and are about to enter a whole new realm of digestive feel-good ‘goodness’, love, joy and simple soulful – nourishment satisfaction!

If you loved this recipe, please let me know over on my instagram and or by dropping me an email saying ‘Pattie love!’. …These are my favourite kind of emails to receive!

P.S. If you are interested in diving deeper into the world of Wholesome Ayurvedic Wholefood Nourishment, in your Kitchen then my new soon to launch 6-Week Ayurvedic Food & Lifestyle Transforamation program, ‘Simple Ayurveda in Your Kitchen’ could be just the next step for you!

…To find out more and be first to know when the doors open next, click here to enter your details and join the official course waiting list!!!


Yay and yesss to feel-good nourishment in life!!! 

Loads of wholesome love, joy and warm yummy delicious Kitchen wishes!


x Lorien 

Wholefood Hazelnut Carob Dream Recipe – The best Chocolate Milk ever!

If you’ve been following me for a while, you may know that I have a major soft spot for Carob that goes back to childhood! It was the ‘chocolate’ of choice that my Mum would buy for me, and amazingly enough the wholefood ingredient of Carob itself is still one of my favourite creamy, sweet wholesome foods when I feel like a treat!

So, what exactly is Carob?  Besides being one of the most delicious earthy flavours/foods on earth, it is a legume ~ a bean that grows on a tree and is native to the Mediteranean and The Middle East. It grows in Australia among other dry warm climates and is one of the only known trees that can withstand severe drought without dying. It is a hearty, strong and resilent tree!

Being a legume, Carob is quite high in plant based protein, making it a great ingredient for Vegans and Vegetarians to incorporate into home-cooked recipes for extra oomph. Aside from it being nutritious, Carob is naturally sweet and creamy and when the bean is roasted and made into a powder, it is the perfect subsitute to Cacao or regular Cocoa powder for making Chocolate. It can even be a great substitute for sugar, as it has such a beautiful natural sweet taste.

Do you or your kids love Chocolate Milk, but want a healthier, cleaner, more nutritious option?

Well my friends, I have just the thing for you!

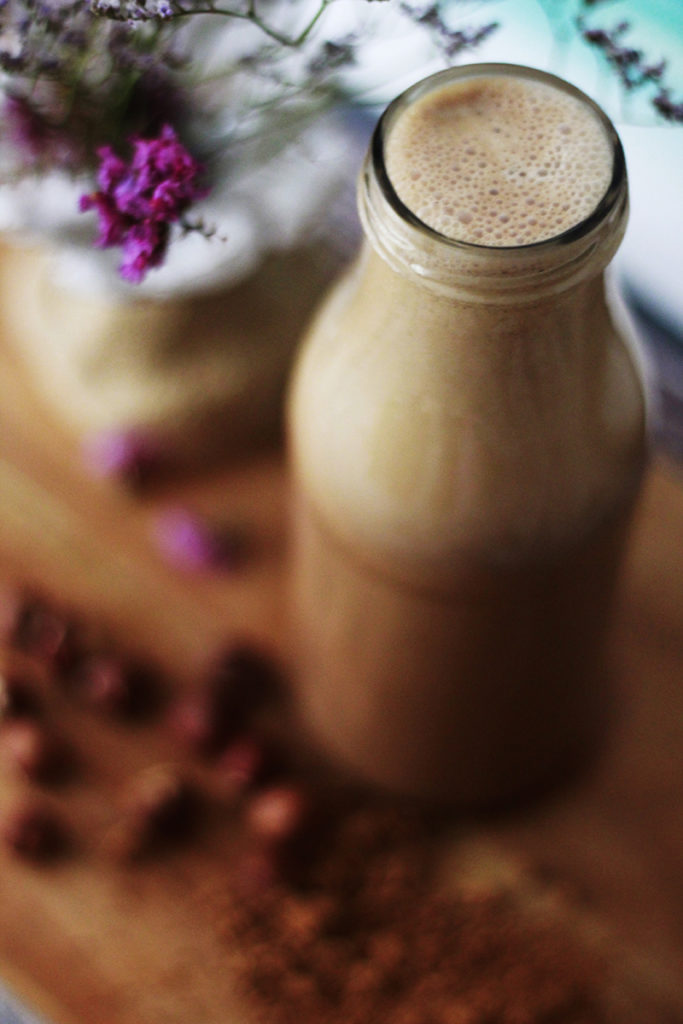
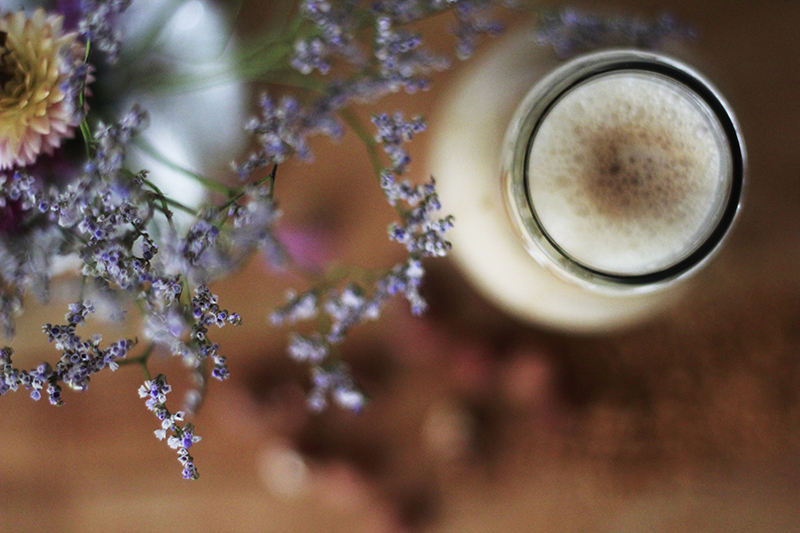
Hazelnut Carob Dream ~ aka: the best Chocolate Milk ever! 

It’s super simple to make, will keep in the fridge for 2-3 days after making and requires only four ingredients.

Ingredients:

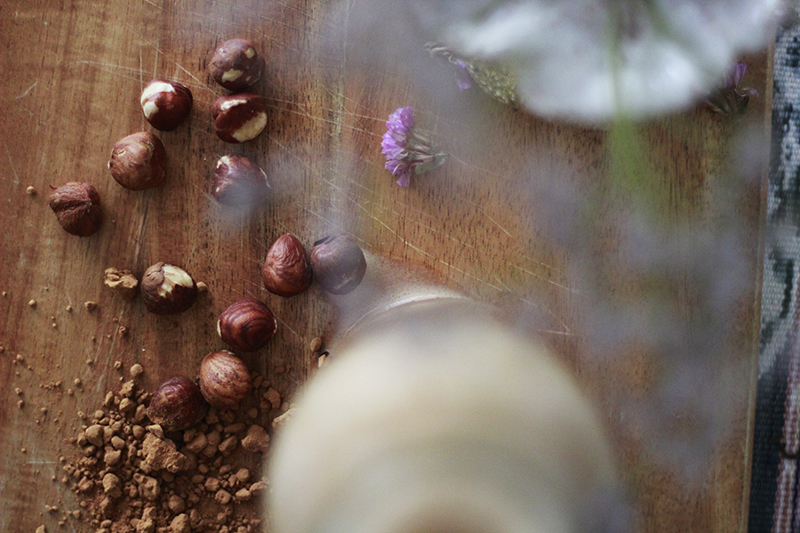
  • 2 cups of soaked hazelnuts
  • 1/4 tsp of sea salt
  • 2 heaped tblsp of roasted carob powder
  • 4 cups of water (filtered water or spring water)
  • *a piece of cheese cloth or a nut-milk bag for straining the milk once blended. (Ask your local health food shop, most shops stock these bags.)

To make this delicious milk follow the following simple steps:

  1. Add soaked hazelnuts to your blender
  2. Add water
  3. Add sea salt
  4. Now blend on high speed for 2-3 mins
  5. Place your cheese cloth or nut bag over a large jar or jug.
  6. Pour the contents of the blender into the bag/cloth and strain out the fibre, so you just have the milk in the jar/jug.
  7. Once strained, place the solids to the side (you can reuse these in another recipe or compost them.)
  8. Next add the milk back into your blender to ‘Carob-ify’ it! :) Add your roasted carob powder and blend for 2-3 mins until blended and smooth.
  9. Next pour into a clean glass bottle or jar and drink or store in the fridge for when you feel like a smooth creamy snack!

Voila! So simple SOOOO and easy!!  Try this at home!

Nourishing, creamy, healthy and delicious.

Enjoy!!

With love and wishes of goodness to you and your family!

x Lorien

Simple Ayurvedic Split Moong Veggie Dhal!

Ayurvedic Dhal and Rice Picnic

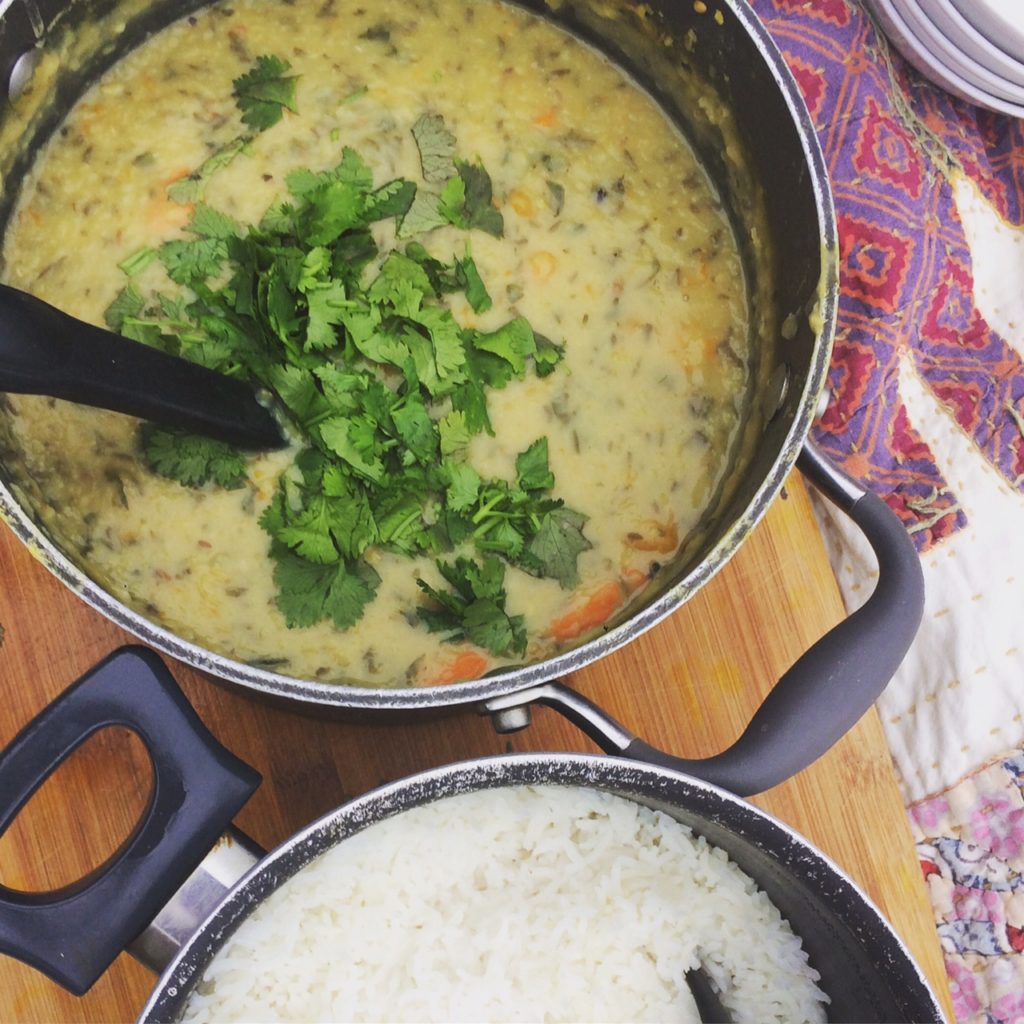
Simple Ayurvedic Split Moong Veggie Dhal with handfuls of fresh coriander!

A dhhaaalicious simple, easy and oh so yummy meal to make for friends, family and loved ones for a non-traditional Christmas lunch or dinner that will nourish your belly and warm hearts!

Split moong is a staple in any Ayurvedic Kitchen and can be made into Dhal like this one here or ‘Kitchari’, by simply cooking the rice and split moong together in the 1 pot, (which is the recipe you’ll find inside my E-book.)

I’ll let you in on a little secret, …the cooking process for making Kitchari and Dhal is virtually the same, Dhal is just made without the rice! 

It’s mostly steamy hot, beachy balmy summer days here in Australia for Christmas, there certainly isn’t much snow falling however whether you’re in the tropics or in a winter wonderland right now… This light and nourishing clean wholesome Dhal will likely hit the spot (and the ingredients are super affordable, which is certaintly a bonus this time of year!)

Yum! Share the dhalll love this festive season! :)  Everything tastes more delicious and nutritious when shared!


Simple Ayurvedic Split Moong Veggie Dhal Recipe       

Ingredients: 

  • 1 cup split moong beans soaked for 1 hour and strained
  • 5 cups boiling water from the kettle
  • 1 tbsp of coconut oil
  • 1 tsp cumin seeds
  • 1 tsp whole coriander seeds
  • 1/4 tsp fennel seeds
  • 1 tsp finely chopped ginger
  • 1/2 tsp turmeric powder
  • 1 tsp sea salt
  • A few cracks of black pepper
  • 1/2 cup finely chopped fresh coriander (or more!)
  • 1/2 cup of diced and skinned pumpkin
  • 1/2 cup of diced carrots
  • Spoons of your LOVE!

Method:

  1. Warm  coconut oil in a saucepan on medium heat then add dry spices; cumin, coriander and fennel seeds. Stir to lightly toast the spices for 2-3 minutes or until they start to sizzle.
  2. Add fresh ginger and turmeric powder. Sauté for 2-3 minutes.
  3. Add the split moong beans and ‘toast’ by stirring the moong into the spices before adding any water.
  4. Next add the chopped pumpkin and carrot. Stir the vegies with the lentils for 3-4 minutes or a bit longer, you’ll know it’s time to add water when the lentils start to get sticky on the bottom of the pot.
  5. Immediately pour your boiling water into the pot at this stage to prevent sticking and bring to the boil for approx 10 minutes.
  6. Add sea salt and black pepper. Stir continuously to bring out the creaminess of the lentils and the veggies.
  7. Turn heat down to medium and simmer with the lid on for approx 20 minutes or until the lentils and veggies become smooth, soft, ‘dhaly’ and creamy.
  8. Once cooked add a generous handful of freshly chopped coriander and stir into the dhal. Serve with a side of steamed basmati or brown rice, a generous garnish of fresh coriander and a squeeze of lemon for extra digestive goodness and tang!
  9. Voila! So easy, so creamy, so dhaaalicious and tummy nourishing!

Enjoy the recipe for this scrumptious dhal and make sure you share the

#wholesomelovinggoodness

by tagging me in your dhaaaalicious photo’s!

Merry Christmas and oodles of love and joy to you and all your loved ones for the holidays! 

x  Lorien 

SaveSaveSaveSaveSaveSaveSaveSaveSaveSaveSaveSave

SaveSave

SaveSave

Ayurvedic Adzuki Quinoa Protein Bowl Recipe

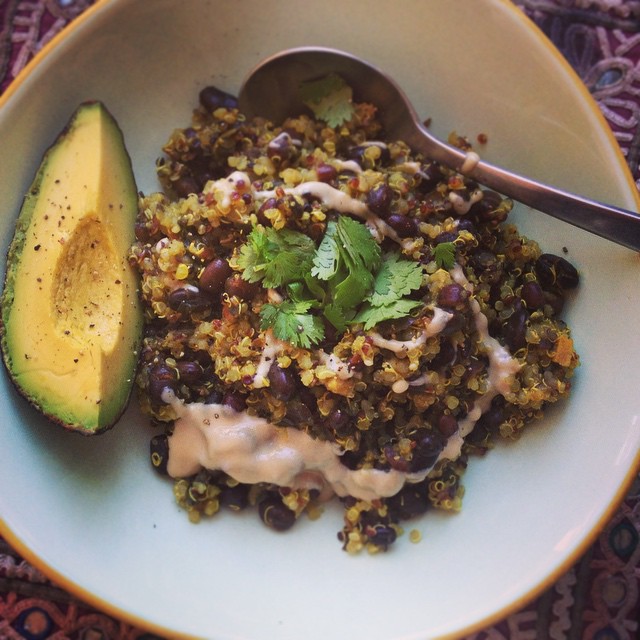
This dish is a simple and delicious vegetarian double protein meal that is light, nourishing and grounding for the digestion. Perfect for Spring, when fasting on soups might be getting a bit boring. Do not fear. Adzuki Protein bowl is here to the rescue!

The secret to making this dish easy to put together is to have the Adzuki and Quinoa pre-cooked.

Adzuki beans take longer than most other pulses that I use in my cooking. They are so lovely as a change of ‘food’ scenery and are well worth the extra effort.

To save time:

  • Boil your Adzuki beans in hot water on a medium heat the night before. Allow approx 1-2 hours of cooking time. Every batch of Adzuki will be different. Some take more or less time to cook. Once you have them cooked. Time to cook your Quinoa. 
  • Rince your Quinoa then place in your pot. For every cup of Quinoa, add approx 2 cups of boiling water. Once you add the water, do not touch. No need to stir. Let the Quinoa steam the same way you would cook rice. Check from time to time and add more water if you see it is necessary. Now that your beans and Quinoa is cooked. The rest is a piece of cake! 

Serves approx 2 – 2.5 people :) :

Organic Ingredients:

  • 2 cups of cooked Adzuki beans
  • 1 cup of cooked Quinoa; white, red, black or mixed
  • Fresh Ginger
  • Spices: Tumeric, Coriander, Cummin
  • Ghee or Coconut oil
  • Fresh Coriander
  • Unhulled Tahini
  • Avocado
  • Celtic sea salt + Black pepper
  • Boiling water
  • Love! (Magic ingredient)

Creation process: 

  1. In your pot add 1-2 tbsp’s of Ghee or Coconut oil.
  2. Add 1/2 tsp of Coriander seeds, 1/2 tsp Cummin seeds and 1 tsp of fresh ginger. Toast these spices together, allowing them to sizzle and expand, then add 1/2 tsp of Tumeric powder and stir. (Onion and Garlic can be added here also/optional).
  3. Now add your pre-cooked Adzuki beans and stir.
  4. Add your Quinoa and mix the beans and Quinoa together, allowing the spices to absorb and soak in. Will be smelling really good by now!
  5. Add a pinch of salt and a few cracks of black pepper.
  6. Your dish is ready to be served. I know… could a dish that is so good, really be so easy!? …In this case, yes. :)
  7. Serve in your bowl of choice. Add a drizzle of tahini with a spoon, then a hearty pinch of freshly chopped Coriander. Slice your Avo in half, then into quarters and scoop the fruit out or leave it in its shell for a more ‘rustic’ presentation.
  8. Now, enjoy! Congratulations on preparing a hearty, nourishing, soulful dish that your body and mind will love!

Yum. Yay. You did it!

Happy nourishing & soulful eating friends! 

x Lorien

Nut-free Ayurvedic ‘Spice Bliss Balls!’


Ingredients:

  • Ghee
  • Besan (chickpea) flour
  • Rice flour
  • Desiccated coconut
  • Sesame seeds
  • Sunflower seeds
  • Dates
  • Coconut sugar
  • Ajwan seeds
  • Fennel seeds
  • LOVE!

Method:

  1. Add 1/2 cup of Ghee to a pan.
  2. Add 1/2 cup of Besan flour and stir… we want to toast the besan flour.
  3. Add 4 tablespoons of rice flour and stir.
  4. Toast the flour in the Ghee on medium heat for approx 10 minutes or until it smells and looks toasted/darker.
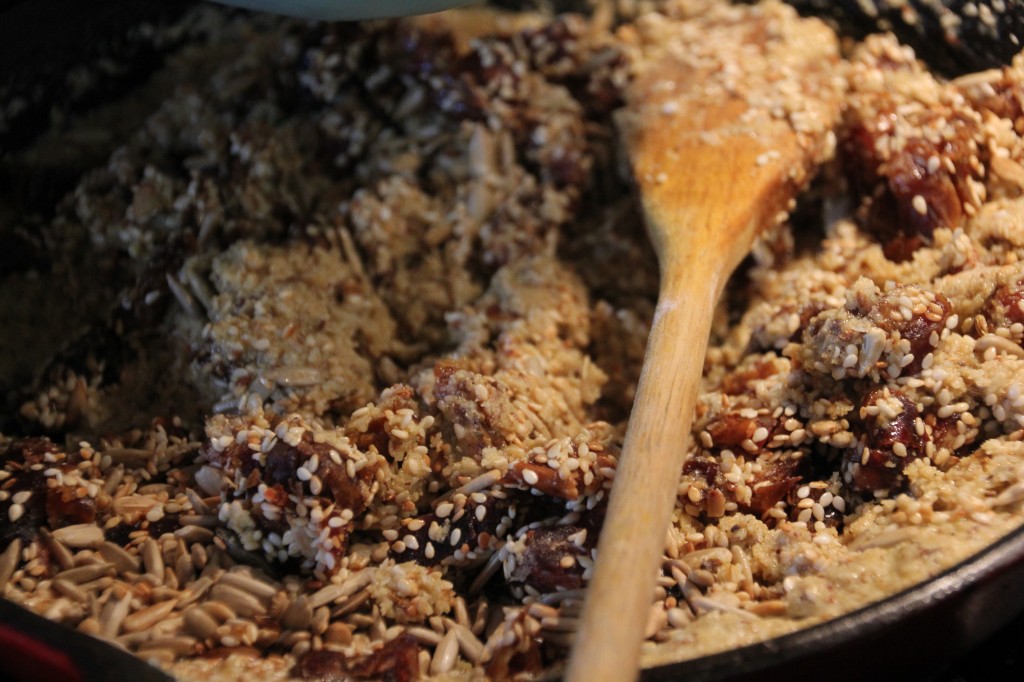
  5. In a separate pan dry toast 3 tbsp sesame seeds, 3 tbs sunflower seeds then pour into separate bowl.
  6. In the same pan, toast your spices. Add 3 tbsp of Ajwain seeds & 3 tbsp of Fennel seeds. Toast until ‘toasted’, they will smell toasted and look toasted. Add the spices to a mortar and pestle and grind into a powder.
  7. Chop 1 cup of dates into small pieces.
  8. Now add the dates, ground spice and seeds to the pan with Ghee and Besan flour and stir.
  9. Pour all ingredients into a mixing bowl, be careful, it will be hot still!
  10. In mixing bowl add 4tbsp of coconut sugar and mix in with the flour, dates, seeds etc.

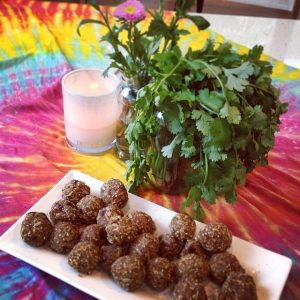
Wait for the mixture to cool, then using your hands roll into small balls and they are ready!

If they are not sticking together properly, add a little extra Ghee to assist with binding.

Enjoy warm or place in the fridge to allow the Ghee to cool and the balls to go hard.

A traditional Ayurvedic treat, warm, toasty and spicy with just the right amount of sweet to cradle you from Autumn into Winter…!

x Enjoy!

Love, Lorien

Wholesome ‘Carob Chocolate’ Recipe!

For those choosing to eat a path of Wholefoods, avoiding excess stimulation to the nervous system, avoiding processed sugars and unhealthy hydrogenated oils, then the prospect of finding some ‘Chocolate’ pleasure to share with your love (or simply your beautiful self!) might seem unnerving.

In Ayurvedic medicine, Chocolate is considered to be heating for the body and easily over-stimulating to the nervous system (brain) which really needs to stay cool, calm & collected! Due to these and some other reasons, Chocolate is not something you will find your Ayurvedic practitioner generally prescribing.

A big part of Ayurveda’s holistic approach is about maintaing balance not become too ‘rigid’ or stuck in one thing or another.

We always have wholesome choices we can make however. When it comes to eating ‘treats’ and things of a ‘Chocolaty’ kind… This is the way I like to do it!

Ingredients:

  • 10 tblsp’s of Coconut oil
  • 3-4 Tbsp’s of Carob powder
  • 1 Tbsp of Tahini/Almond butter or Sunbutter
  • 1/4 tsp of Sea salt
  • Dash of Vanilla essence
  • 1 tsp of Cinnamon powder (In Ayurveda this helps the body digest Sweet foods & improves circulation)
  • Major ingredient, LOVE!

*To set the Chocolate’s you can use an ice-cube tray (one with silicon at the bottom for ease is best!)

 Method:

  1. Melt Coconut oil and pour into a bowl.
  2. Add your Carob to the bowl and mix with your favorite spoon.
  3. Add Tahini, Almond butter or Sunbutter and stir thoroughly. (We want the consistency as smooth as possible!)
  4. Next add the vanilla, cinnamon, salt and stir.
  5. Pour your mix into your chosen chocolate mould or ice cube tray and place the chocolates in the freezer for approx 30mins to allow them to set!

When they are ready to serve, pop out the hearts and enjoy these real – wholefood sweet treats!

An easy peazy, simple, homemade creation that will satisfy your Chocolate taste-buds & leave you feeling balanced and calm after-wards!

*Carob is naturally sweet. This recipe is 100% sugar free and sweetener free as this is how I love to make them 95% of the time! J To make these chocolate treats a little sweeter or for a special occasion, you can add a dash of maple syrup – both delicious and slightly different! J

* Customise your choclates by adding a few Goji berries on top, some currants, desiccated coconut or whatever your tummy, heart and taste-buds desire! Yum! 

With Love!

x Lorien


Ginger Water for Digestion

Ginger water opens the channels known as ‘Srotas’ in Ayurveda, burns up excess toxins known as ‘Ama’ and improves the power of your digestive fire, known as ‘Agni’ in Ayurveda! Yay!

Particularly great during the cooler months of the year when the channels of the body naturally start to contract with the cold environment. Ginger water will balance this and keep things flowing freely.

Ingredients:

  • 1 tsp of Certified Organic (for best results for you & the planet) Dry Ginger powder.
  • 2 cups of purified water

Method:

  1. Boil the Ginger powder and water in your pot.
  2. Allow to cool until a good warm drinking temperature
  3. Serve straight or with 1/2 a tsp of raw, unprocessed sugar known as Jaggery or Rapadura for a dash of wholesome sweetness with your Ginger!

*Freshly grated or sliced Ginger can also be used to warm the body and improve digestion. For the purpose of this remedy, using the powdered Ginger has a stronger effect on warming the tissues of the body and improving digestion.

To healthy, happy free flowing channels and balanced digestion! 

Yum!

x Lorien

Recipe: Golden Ayurvedic Besan Flour Breakfast Pancakes

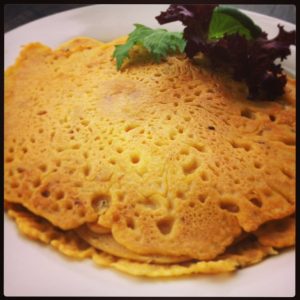
Besan (chickpea flour) pancakes are a beautiful Ayurvedic meal that can be enjoyed any time of the day.

Particularly grounding and yummy for a light breakfast.

Simple to make and a great source of protein to support and nourish your tissues, while being light and easy to digest. Perfect!

Simple Besan Flour Pancake Recipe:

Organic Ingredients:

  • 1 cup of Besan Flour (Hint: …It looks yellow.)
  • 2.5 cups of filtered water
  • 1/2 a small Red Onion chopped finely
  • 1/2 tsp of Cumin seeds
  • 1/4 tsp of Himalayan good quality salt.
  • Some black pepper to taste
  • Ghee
  • A mixing bowl & wooden spoon.
  • A good quality stainless steel, cast iron or ‘healthy’ non-stick pan. (Important not to use teflon or poor quality as you will end up eating the toxic plastic or Aluminium which is not worth having for breakfast!)
  • Love!

Method:

  1. Take your mixing bowl and add the Besan flour. With your wooden spoon, smooth out any lumps and bumps in the flour as much as possible.
  2. Add your water and stir into a smooth batter.
  3. Add your Onion, Cumin, Salt & Pepper.
  4. Start heating your pan and add approx 1/2 tsp of Ghee.
  5. When the Ghee is warm, pour some of the mixture into the pan to create your first pancake. Yay! Let it cook until it bubbles around the edges and in the middle slightly, then flip it over.
  6. Cook until golden brown on both sides…
  7. Serve with some fresh greens, some Chutney or a side of steamed vegies for something more substantial.

Voila!

Delicious, nutritious, QUICK, simple, yummy, healthy Besan Flour Ayurvedic Pancakes that the whole family will enjoy!

(Note: Add more water if needed to make your desired consistency. Coconut oil can be used as an alternative to Ghee, however has a different effect on the body and different taste. This recipe really lends itself to Ghee!)

Enjoy with love & gratitude!

x Lorien

 “Let thy food be thy medicine.”

~Hippocrates 

Quinoa & Moong Bean Vegetarian Stew Recipe

Ingredients (2 Serves):

  • 1 cup of Moong Beang’s soaked in water for approx 24 hours, then rinsed & strained.
  • 1 cup of Quinoa (mixed red & white variety).
  • 1 cup of Pumpkin cut into cubes.
  • A few freshly chopped green leaves of Kale or Spinach
  • 1.5 tsp’s of Freshly chopped or grated Ginger
  • 1/2 tsp of Turmeric powder
  • 1/2 tsp of Cumin seeds
  • A pinch of Fennel seeds
  • 1/2 tsp of Coriander seeds
  • 1 tablespoon of Ghee or Coconut oil
  • 1 tsp of Himalayan salt
  • Black pepper
  • 6 cups of Hot water (4 cups for Moong & 2 cups for Quinoa).
  • Freshly chopped Parsley or Coriander to garnish.

Method: ~ Moong Bean Vegie Stew

  1. In a pot place your Ghee or Coconut oil and warm until the oil is melted.
  2. Add your Cumin, Coriander and Fennel seeds and allow them to toast and start to ‘pop’.
  3. Add your Ginger and Turmeric Powder and stir until they are mixed together. (Approx 20 seconds will be a good amount of time).
  4. Add your Moong beans and stir. Allowing the spices and the beans to toast and mix together.
  5. Add your Pumpkin and stir it into the mix.
  6. Add your hot water and continue to stir regularly for approx 15 mins.
  7. Add your fresh Kale & Spinach and stir.
  8. Add your Himalayan Salt & a few pinches of black pepper.
  9. Allow to cook like this until the Pumpkin and Beans are soft, then turn off the heat and place a lid on the pot to let the flavours develop and the beans and pumpkin to become nice and soft. Now let it sit, whilst you prepare your Quinoa!

Method: ~ Quinoa

  1. Take your Quinoa and place in your pot.
  2. Dry toast your Quinoa in the pot for a few minutes until the Quinoa becomes warm and starts to make ‘toasty’ sounds.
  3. Add approx 2 cups of hot water. Enough water so that it sits above the Quinoa. You may need to add more as it cooks. If so, add it little by little.
  4. Add a pinch of Himalayan salt for minerals.
  5. Allow to boil. No need to stir Quinoa. Just let it boil and bubble away.
  6. Cook for 10-15 minutes like this until the Quinoa grains have expanded and the water is almost fully evaporated.
  7. Turn off the heat and place a lid on top and allow to sit for another 7-10 minutes. (If you have too much water still, then continue to cook for a bit longer, before turning it off and putting the lid on.)

Voila, by now you will have fluffy yummy Quinoa & a juicy wholesome Moong Bean Stew!

To serve, add Quinoa to your bowl, then next to it, your Moong Bean stew & garnish with some freshly chopped Coriander or Parsley. It is ready to eat!

Enjoy! :)

x Lorien

Ayurvedic Turmeric Chai Recipe

Immune boosting deliciousness…

Turmeric is a natural ‘anti-biotic’, anti-inflamitory super spice!

Traditionally ‘Chai’ is made using black tea, Cow’s milk and a lot of sugar. These traditional Chai recipes can have their place. In India Chai is a social currency and without the black tea, milk and sugar it is quite possible that the train stations would stop and India would come to a stand-still. It really is a huge part of life and if you have ever sampled the Chai over there, you will know that it can be quite addictive!

This ‘Spiced Turmeric’ Chai Recipe is a delicious ‘medicinal’ (yet still so yummy) Chai that is warming, grounding, nourishing and calming all year round, through each season and time of the day or night.

It can be made with fresh Almond milk, Rice Milk or purely on water for a ‘dairy-free’ alternative or with a Organic Unhomogenised Cow’s milk for a more grounding, rich brew.

The choice of milk is up to you. Listen to your body and what it feels would be most balancing. Using the purest quality Organic Spices will make a difference, allowing for not only greater nutritional goodness within the spices to be available for your body, good quality spices will also offer greater flavour, aroma and will give your Chai a touch of magic!

Ingredients:

  • Fresh Turmeric Powder
  • Fresh Ginger
  • Cardamon pods
  • Cinnamon powder & or stick.
  • Cloves (optional)
  • Nutmeg (optional)
  • Fennel seeds
  • Rice Milk (Organic Un-homogenised Cow’s milk can also be used).

The secret to this Chai is to use an abundance of fresh Ginger! You can grate the Ginger or slice it finely. The quantity is up to you.

Steps:

  1. Pour 2 cups of milk (or water) into your pot
  2. Add fresh ginger
  3. Add a teaspoon of cardamon
  4. Add a 1/4 of teaspoon of cinnamon
  5. Add a pinch of Nutmeg
  6. Add a few cloves
  7. Add a pinch of fennel seeds
  8. Add 1/2 teaspoon of Turmeric powder and stir
  9. Allow to boil, then allow to cool down before straining & serving!

Yum!

Happy spicing, drinking & loving!