Luscious DIY Organic Vanilla Body Butter!!!

BODY-BUTTER


It’s summer and that means season of beaching ~ bathing and ‘balming’ is here!

During the summer months our skin is moist from the humidity in the air, yet it can still be easily dehydrated due to spending time outdoors, in the elements, in the sun and in the salty ocean.

It’s important to feed the skin as much as you feed your body – as the days have been gradually getting warmer my skin has been cravings some solid hydration, moisturization & nourishment!

Organic is always my number #1 priority when I look for a body moisturiser or body butter.

I love using the Miessence Intensive Body Cream along with a good yummy body butter, I enjoy using them both at different times of the week depending on how my skin is feeling and what mood I’m in.

I have only ever found one body butter that is organic that I have loved and sadly it is only sold in one shop miles and miles away from where I live and the postage to order some was through the roof – so out of hydration/body butter desperation I finally  got the motivation to pull out the raw ingredients I’ve had at home and whip up my own wholesome yummy body-liscious (practically edible) body butter delight which happened to turn out amazing!!!

It is so much fun making your own goodies from scratch. It’s empowering to know that you can provide the body butter nourishment through using your own two hands when thats what your body wants and needs.

I’ve been loving this yummy treat – here is the recipe for you to have a play with at home!

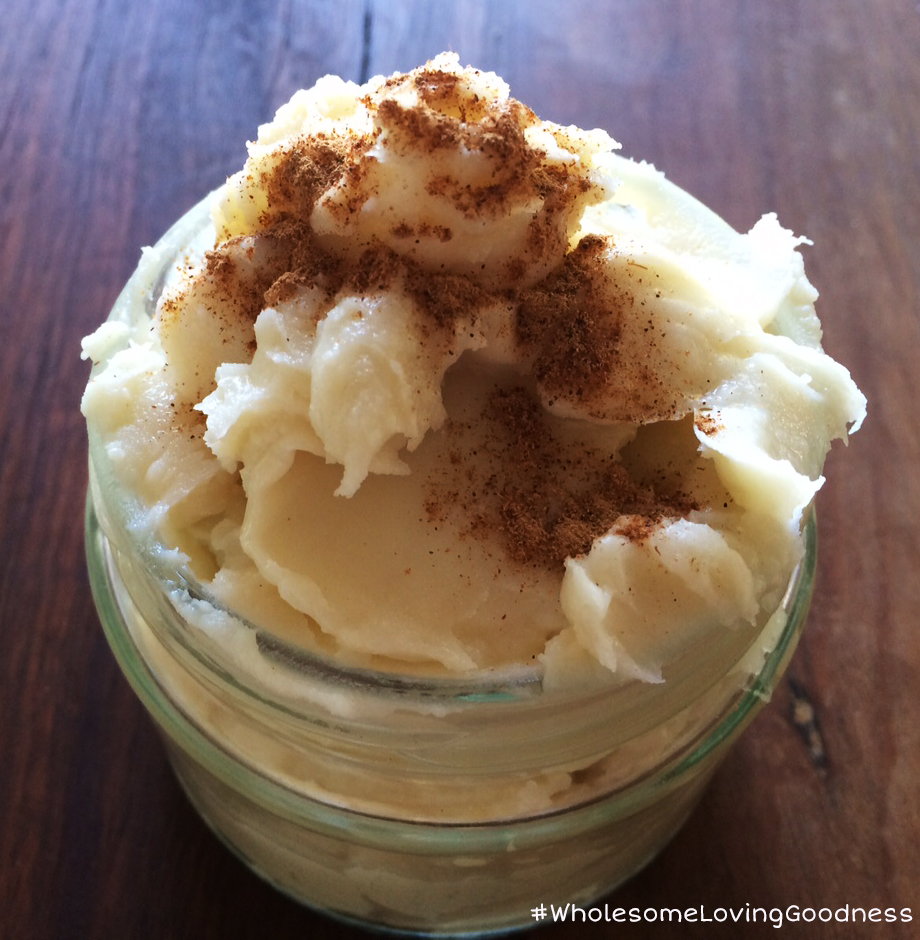
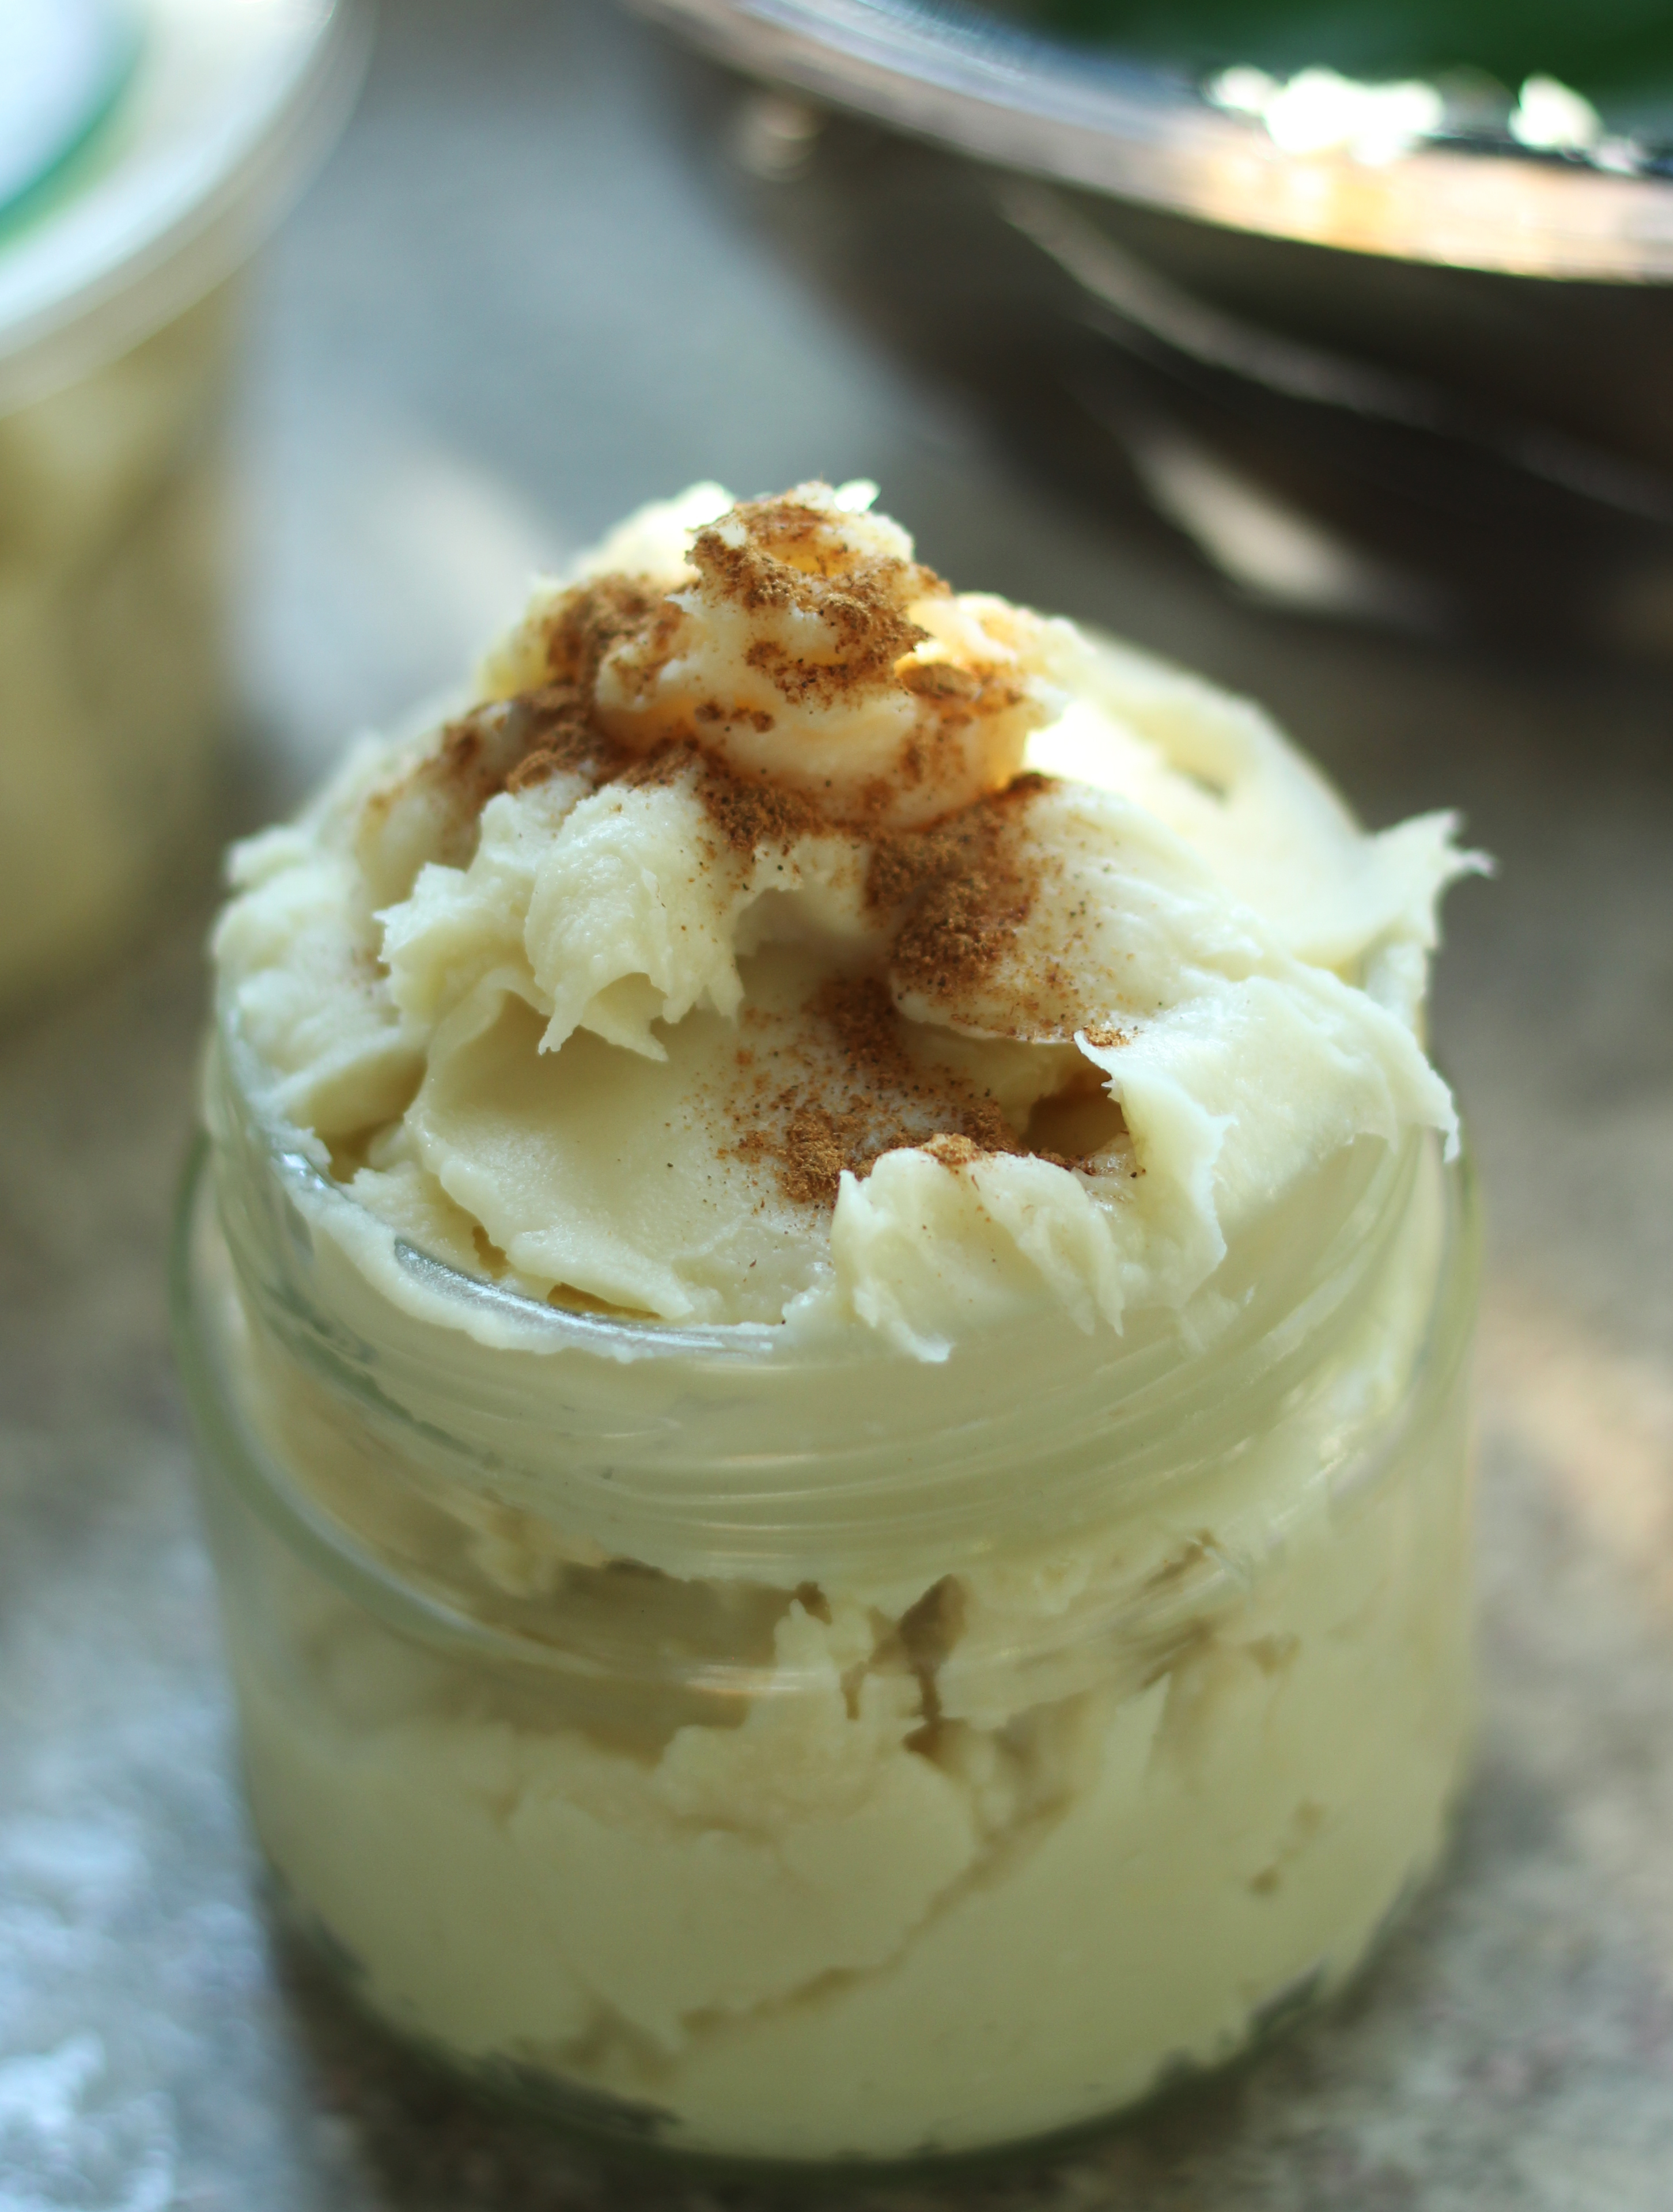
 ‘Body-liscious DIY Vanilla Body Butter’ Recipe

Ingredients:

  • Shea butter
  • Sunflower oil
  • Coconut oil
  • Food grade vanilla extract
  • Your love (of course!)

Creation Process:

  1. Melt approx 200g raw Shea butter in a bowl over a pot of boiling water.
  2. Add: 1tbsp of coconut oil, 2tbsp of Sunflower oil & 15 drops of edible liquid vanilla.
  3. Mix melted ingredients together until smooth and even then let sit to cool.
  4. Once cooled check the consistency of the butter and give another little whisk or mix with a spoon to whip it up a little.
  5. Scoop it into a clean jar and sprinkle with cinnamon (for fun!)

Massage it into your beautiful body and lap up the lusciousness of this yummy simple ~ body loving creation!!

Yum, yum, yummm!!!

Let me know how this turned out!

Take a pic and tag #WholesomeLovingGoodness so I can see your beautiful creations! :)

Summery, balmy, body luscious love!

x Lorien 

Rainy Day Hot Chocolate Cravings & the Simple Solution! :)

Wholesome Vegan Rainy Day Hot Chocolate in a earthy hand made cup!

It is raining today and this cold change has got me craving a warm hot chocolate ~ though not just any kind of hot chocolate from a café will do. I want something real, smooth, creamy and chocolaty!

I got the inspiration while I was out and about picking something up from the post office… I could have orderd a hot choc from the local café and I didn’t… I wanted to alcehmise my own delicious intuitive brew at home so I asked my hot choc urge to be patient until I got home and this is what I came up with – and it’s deeelicious, scrumptious, smooth, creamy, chocolatey and naturally sweet (with love!) – nothing else added!

Enjoy this cosy, warming, sugar-free, beverage to fulfil your secret (or not so secret) rainy day hot choc fantasies!

You will need:

  • 1 cup of your choice of milk (coconut milk, almond milk, rice milk or unhomogenised dairy)
  • 1 tbsp dark carob powder
  • 1 tsp raw cacao powder
  • ½ tsp Ceylon cinnamon powder
  • Your juicy, creative hot chocalicious love!

To Brew: Pour your milk into a pot and add carob, cacao and cinnamon. Stir with a small whisk to blend powders together nicely or use a spoon or fork. Bring to a gently bubbling boil until your chocy drink gets a little frothy (frothy is good!) then turn it off, find your favourite mug, get your blanky, a relaxing – sumptuous song to listen to (like Sade) and sit… and sip… and drink your uber smooth, creamy, wholesome and real divine home made hot choc and think of how fun it was to make your own brew!  Yum!

Enjoy!

For more recipe join my mailing list on the right (look for the cardamon pods!) and stay tuned for the release of my first ever recipe ebook that will be dancing into a kitchen near you soon!

x Lorien

Feeling Tropical! Vegan Black Rice Porridge Recipe

Vegan Black Rice Pudding Recipe - Organic Wholefood Ayurvedic Cooking Vegetarian

H E L L O ~ D E L I C I O U S N E S S !

My aaaaalllllll time favourite food while growing up was this – (apart from its fruity counterpart: fresh papaya!)

I was first introduced to this nourishing, exotic, delectable pudding while on holidays in Indonesia with my mum. I also grew up close to an authentic Indonesian restaurant called ‘Masakan Indonesia’ on the Gold Coast ~ my love for black rice pudding was sustained between our family trips to bali and our family dinners at Masakan. :) Such happy , yummy memories! I’m smiling just contemplating those precious black rice days!

Mum and I made it at home also ~ as with anything delicious, it is fun to explore making it for yourself and this also adds to being able to appreciate the subtlety and elegance that chefs go through in order to master their recipes. I loved the ones we made at home and I loved the ones we ate either in Bali or at Masakan.

I recently discovered ORGANIC black rice for sale at my local health food shop. Excitement! :) One of the reasons I had not made my black rice pudding in a while was because I could only find black rice at specific exotic asian grocery stores – and this was not always convenient to find and I really do prefer to eat organic whole foods for optimum nutrition and care of myself and planet, so buying the non-organic heavily transported type turned me off a bit.

The second reason I stopped buying or making black rice pudding is because the bought ones in restaurants often have loads of sugar in them (as delicious as they are!). This turns me off. I have a new respect and awareness of sugar these days since reading ‘Sweet Poison’ by David Gillespie (great easy read!) and also since studying nutrition and the way food affects our immune system, mental functioning and emotions. Black rice tastes so good with sugar – these days I like to use WHOLE-FOOD sweeteners as much as possible.

My Favourite Wholefood Sweeteners:

  • Medjool dates
  • Maple Syrup
  • Carob 
  • Honey (not for baking or cooking)

If I’m ever going to use sugar I will choose the most ‘whole’ form I can get such as coconut sugar, rapadura sugar or jaggery. In my ayurvedic studies I learnt that these whole forms of sugar can be good for the body and this is true – at certain times and in certain instances, some whole sugar can be medicine. On the whole though – for me personally I feel cleaner, clearer and have more energy when I keep to my natural WHOLE FOOD sweetness listed above as even though whole-sugars still have minerals intact, they can still affect the body in a similar way to regular processed sugar as if you think about it – they are still concentrated condensed crystals of energy. It is easy to be addicted to sugar these days so I choose to get myself hooked on more sober tastes and flavours when I want a sweet hit and the list mentioned above generally always does the trick! :)

Organic Sugar-free Black Rice Pudding is now well and truly back on the menu in my kitchen! :)

If you feel like having some tropical ‘Indonesian’ black-rice pudding fun at home, here is my sugar-free + vegan black rice recipe for you to have a play with! :)

Wholesome Vegan Coconut Black Rice Pudding Recipe

Ingredients: 

  • 1 cup organic black rice
  • 3 cups of boiling water
  • 1 tsp of cinnamon
  • 1 tsp maple syrup (optional)
  • 2 cups of coconut milk
  • shredded coconut (to toast and add as a garnish!)

Creation process:

  1. Rinse your black rice and boil the kettle (it’s always good to give your grains a rinse prior to cooking).
  2. Place your rice in your pot and add approx 3 cups of  boiling water to steam the rice.
  3. Bring to a boil and place the lid on. Cook until the rice is soft and the water has absorbed.
  4. Remove from the heat once steamed and add 2 cups of coconut milk, a dash of maple syrup, 2 tsp’s of cinnamon and your love!
  5. Serve your pudding warm in your favourite bowls and garnish with some fresh banana, papaya, toasted coconut and or a few cheeky raisins.

Voila! So easy, black rice pudding in a flash with whole food ingredients to make this sweety treaty nourishing and delicious! :)

Happy creating in the kitchen! 

Love,

x Lorien

Spring Moong Bean Kitchari Recipe with fresh parsley & creamy salted avocado! Gluten Free / Vegetarian / Vegan / Wholesome!

Ayurvedic Kitchari Recipe - Vegan - Vegetarian - Gluten Free - Wholesome

The best nutritional path to take in life is the one that suits you most!

We are all unique and this means that our bodies and digestive systems are unique as well! (Yay! how beautiful is that!)

Our bodies thrive when we can listen and be intuitive about our food & lifestyle choices.

Instead of following the latest food trend or getting overwhelmed by varying food philosophies – ask your body what it wants, what it needs and then listen. You are not like anyone else. Doing what everyone else does will never be truly nourishing.

In order to really nourish yourself – you must listen to the call of your tummy, your feelings, your passions and your inspirations.

Ask yourself these questions… Which foods feel amazing in your tummy? & Which foods make your heart and mind sing? and move towards those things… experiment, play and explore!

Often creating this inner connection with self is all that is needed to soothe, calm and rebalance the intelligence of our body, heart and mind. 

It’s exciting, it’s fun and it’s delicious to open up, to explore your body and to listen to what foods your body wants, loves and needs.

Master your eating and you will master your mind… this is what the Ayurvedic sages of India share with us.

“Quality of mind depends on quality of food.” ~The Vedas 


Ingredients:

  • 2 cup whole moong beans (soaked overnight)
  • 1 cup basmati or brown rice (washed 3 x and strained)
  • 1/4 pumpkin chopped into cubes
  • 1 cup green beans chopped into small pieces
  • 8 cups of boiling water
  • 1 tbsp coconut oil or ghee
  • 1 tbsp freshly chopped ginger
  • 1 clove of garlic finely chopped/pressed
  • 1/2 a red onion finely chopped
  • 1 tsp cumin seeds, 1tsp coriander seeds, 1/3 tsp turmeric powder
  • 1 tsp himalayan salt & a few cracks black pepper
  • 1/2 ripe avocado & some fresh parsley or coriander
  • your love! :)

So easy to digest, nourishing & in Ayurvedic texts said to be a ‘complete protein’!

Creation process:

  1. Add 1 tblsp Ghee or Coconut oil to your pot
  2. Once melted, add 1/4 teaspoon of Cumin seeds & Coriander seeds. Allow to toast.
  3. Add Ginger, garlic and onion to the spices & toast. (Garlic & Onion is optional).
  4. Add 1/3 teaspoon of turmeric powder & stir.
  5. Add 2 cups of soaked & rinsed whole moong beans.
  6. Add 1 cup of rice.
  7. Stir & toast in the spices for a few minutes to lighten the lentils & rice for improved digestion.
  8. Place your chopped pumpkin and green beans in the pot.
  9. Add 8 cups of boiling water & stir. Allow to gently boil.
  10. Add a pinch of Himalayan salt and a few cracks of black pepper.
  11. Continue to stir regularly – adding your juicy love! :) Cook for approx 20-30 minutes on a medium heat.
  12. When Rice & Moong become creamy, turn off the heat and serve with an extra spoon of ghee or coconut oil on top, 1/2 an avocado sliced and salted and a fresh garnish of parsley or coriander!

Voila!

A super delicious nourishing vegetarian and vegan (minus the ghee!) complete protein dish! Yum! This is such an easy meal to make during the week when it’s hard to come up with creative ideas for the family and you want something fast, nourishing AND delicious! :)

Bon appetite! :)

x Lorien

Wholesome Spring Ayurvedic ‘Green + Gold Soup’ Recipe!

wlg_vegie_souplay

The chill of winter is starting to fade as the sun begins to rise a little earlier each morning; set a little later each evening and transition back to summer.

Spring is the beautiful in-between season that allows us to slowly say goodbye to winters woolly-weeks and hello to the sprouting fresh blossoms of spring.

In Ayurvedic medicine spring is a very important time of the year for paying attention to the body and practicing mindfulness towards our food and daily activities. With the start of warmer weather, our bodies know that it is time to ‘lighten-up’, cleanse, purify and clear the decks of one season to make room for the next. We go from hibernation mode to being engaged and more easily outward in the world.

In summary: having the awareness and capacity for being able to adapt to the changing environment around you is key factor in maintaining a balances, healthy strong body and mind.

Health is a state of inner-balance!

One of the best ‘foodie’ ways to specifically nourish, balance and gently cleanse your body during Spring is to eat warm, light, easy to digest foods such as Soup!

In the spirit of spring I have prepared a special soup recipe for you to get you on your soupy way!

Stay in tune with your body, spring-clean, dance in the sun and eat soup!

wholesomespringsoup_lorienwaldronrecipes_web

Ingredients:

  • 1 tbsp ghee
  • spices: 1 tsp of each; cumin, coriander & ¼ tsp fennel seeds
  • 1 tbsp fresh ginger finely chopped
  • 1 tsp fresh turmeric finely chopped & ½ tsp of turmeric powder
  • 1 leak chopped
  • 1 zucchini chopped into small pieces
  • 1 small head of broccoli chopped into pieces
  • 1 stick of celery chopped small
  • 1 cup of pumpkin chopped into cubes
  • 1 cup of green beans chopped small
  • 1 handful of chopped fresh coriander
  • 4 cups of boiling water
  • 1 tsp of sea salt
  •  ¼ tsp black pepper

Creating your soup:

  1. Place a spoon of ghee into your pot on a medium heat and stir in cumin, coriander and fennel seeds.
  2. Stir in fresh ginger, turmeric, turmeric powder and chopped leek; toasting for 2-3 minutes to coat your ingredients in the ghee and spices.
  3. Add your vegetables: zucchini, celery, pumpkin, green beans, broccoli and stir them into the spices.
  4. Add 4 cups of boiling water, sea salt, black pepper and fresh coriander.
  5. Place the lid on and let simmer on medium heat for 15 minutes or until your vegies are soft and cooked.
  6. Serve in your favourite bowl with a garnish of fresh coriander and a few extra cracks of pepper & sea salt to taste.

I hope you enjoy this delicious simple soupy recipe as much as I enjoyed shopping for these seasonal fresh organic ingredients and making it!

Wishing you and your family a beautiful spring!

Wholesome Love & Yumminess!

x Lorien

Ayurvedic Warm Spiced Milk

A little warm Ayurvedic spiced morning milk on this cooler summers morning in my fairy garden, all my regular spices to aid digestion (cardamon, fennel, cinnamon, fresh ginger + today a little nutmeg + saffron) plus a little something extra from the beautiful ladies at Ayurbotanicals ~ thankyou for your lovely New Years gifts of your herbal blends!

Today I added a teaspoon of their ‘pure performance’ herbal blend that has specific herbs for strengthening the body and giving extra stamina for the day ahead!

…When the weather is cool and windy, balance yourself out with warm and grounding foods and drinks. Herbal teas, spiced milk, soups, porridge… All the warm yummy things! Your ‘vata’, the air element in your body will thank you for it!

(P.S. Milk is boiled biodynamic raw dairy milk) for this cooler summers morning.

X

Ayurvedic Adzuki Quinoa Protein Bowl Recipe

This dish is a simple and delicious vegetarian double protein meal that is light, nourishing and grounding for the digestion. Perfect for Spring, when fasting on soups might be getting a bit boring. Do not fear. Adzuki Protein bowl is here to the rescue!

The secret to making this dish easy to put together is to have the Adzuki and Quinoa pre-cooked.

Adzuki beans take longer than most other pulses that I use in my cooking. They are so lovely as a change of ‘food’ scenery and are well worth the extra effort.

To save time:

  • Boil your Adzuki beans in hot water on a medium heat the night before. Allow approx 1-2 hours of cooking time. Every batch of Adzuki will be different. Some take more or less time to cook. Once you have them cooked. Time to cook your Quinoa. 
  • Rince your Quinoa then place in your pot. For every cup of Quinoa, add approx 2 cups of boiling water. Once you add the water, do not touch. No need to stir. Let the Quinoa steam the same way you would cook rice. Check from time to time and add more water if you see it is necessary. Now that your beans and Quinoa is cooked. The rest is a piece of cake! 

Serves approx 2 – 2.5 people :) :

Organic Ingredients:

  • 2 cups of cooked Adzuki beans
  • 1 cup of cooked Quinoa; white, red, black or mixed
  • Fresh Ginger
  • Spices: Tumeric, Coriander, Cummin
  • Ghee or Coconut oil
  • Fresh Coriander
  • Unhulled Tahini
  • Avocado
  • Celtic sea salt + Black pepper
  • Boiling water
  • Love! (Magic ingredient)

Creation process: 

  1. In your pot add 1-2 tbsp’s of Ghee or Coconut oil.
  2. Add 1/2 tsp of Coriander seeds, 1/2 tsp Cummin seeds and 1 tsp of fresh ginger. Toast these spices together, allowing them to sizzle and expand, then add 1/2 tsp of Tumeric powder and stir. (Onion and Garlic can be added here also/optional).
  3. Now add your pre-cooked Adzuki beans and stir.
  4. Add your Quinoa and mix the beans and Quinoa together, allowing the spices to absorb and soak in. Will be smelling really good by now!
  5. Add a pinch of salt and a few cracks of black pepper.
  6. Your dish is ready to be served. I know… could a dish that is so good, really be so easy!? …In this case, yes. :)
  7. Serve in your bowl of choice. Add a drizzle of tahini with a spoon, then a hearty pinch of freshly chopped Coriander. Slice your Avo in half, then into quarters and scoop the fruit out or leave it in its shell for a more ‘rustic’ presentation.
  8. Now, enjoy! Congratulations on preparing a hearty, nourishing, soulful dish that your body and mind will love!

Yum. Yay. You did it!

Happy nourishing & soulful eating friends! 

x Lorien

Nut-free Ayurvedic ‘Spice Bliss Balls!’


Ingredients:

  • Ghee
  • Besan (chickpea) flour
  • Rice flour
  • Desiccated coconut
  • Sesame seeds
  • Sunflower seeds
  • Dates
  • Coconut sugar
  • Ajwan seeds
  • Fennel seeds
  • LOVE!

Method:

  1. Add 1/2 cup of Ghee to a pan.
  2. Add 1/2 cup of Besan flour and stir… we want to toast the besan flour.
  3. Add 4 tablespoons of rice flour and stir.
  4. Toast the flour in the Ghee on medium heat for approx 10 minutes or until it smells and looks toasted/darker.
  5. In a separate pan dry toast 3 tbsp sesame seeds, 3 tbs sunflower seeds then pour into separate bowl.
  6. In the same pan, toast your spices. Add 3 tbsp of Ajwain seeds & 3 tbsp of Fennel seeds. Toast until ‘toasted’, they will smell toasted and look toasted. Add the spices to a mortar and pestle and grind into a powder.
  7. Chop 1 cup of dates into small pieces.
  8. Now add the dates, ground spice and seeds to the pan with Ghee and Besan flour and stir.
  9. Pour all ingredients into a mixing bowl, be careful, it will be hot still!
  10. In mixing bowl add 4tbsp of coconut sugar and mix in with the flour, dates, seeds etc.

Wait for the mixture to cool, then using your hands roll into small balls and they are ready!

If they are not sticking together properly, add a little extra Ghee to assist with binding.

Enjoy warm or place in the fridge to allow the Ghee to cool and the balls to go hard.

A traditional Ayurvedic treat, warm, toasty and spicy with just the right amount of sweet to cradle you from Autumn into Winter…!

x Enjoy!

Love, Lorien

Saffron Warm Milk!

Warm Ayurvedic Milk with Saffron, Cinnamon & Fennel!

A super-charged, Ojas boosting , yummy, rejuvenating, warming, reproductive tissue-nourishing Ayurvedic drink!

Milk: Dairy milk can be very nourishing for the deeper tissues in the body, particularly the reproductive system. When using milk, consider it as being ‘medicine’.  This means that we want to honour the milk and take it with awareness and moderation.

A few tips to make your milk easier to digest:

  1. Always boil your milk. Milk is heavy and cool in nature and through the process of heating milk and consuming it while warm, we make the milk warmer, lighter and easier to digest. The process of heating milk also purified the milk, making it more potent and digestion friendly!
  2. Always use organic, un-homogenised Jersey milk where possible. The milk from Jersey cows is called ‘A2’ milk and this milk has been shown to be easier to digest than the milk that comes from ‘fresian’ cows, a different breed. In India, the cows that provide milk are Jersey cows. It is important to use un-homogenised milk as the process of homogenisation spins the fat particles so fast that they get dispersed and separated. When the body takes in this milk that has been altered, it doesn’t know what to do with it, as the particles don’t match up the way they ought too. This creates an inability for the body to digest the milk and can cause a range of upsets and intolerances to dairy.
  3. Add spices to make the milk easier to digest, improve your digestion and allow for proper nourishment to occur. Spices such as Cardamon, Cinnamon, Ginger, Fennel and Saffron go wonderfully with milk and they taste and smell delicious!
  4. Drink as medicine and use in moderation. A warm milk before bed is wonderful simple remedy to calm and sooth the nervous system, nourish the tissues, rejuvenate the reproductive system and build up ‘Ojas’, which is like our ‘life-force’, essence, juice, glow, joy in life!

Art by: Devendra Sharma

Happy Spicing and boiling friends! :)

Feel free to write a message for any further questions on Milk!

(A comments section on the website shall be installed soon!) :)

x Love Lorien

Wholesome ‘Carob Chocolate’ Recipe!

For those choosing to eat a path of Wholefoods, avoiding excess stimulation to the nervous system, avoiding processed sugars and unhealthy hydrogenated oils, then the prospect of finding some ‘Chocolate’ pleasure to share with your love (or simply your beautiful self!) might seem unnerving.

In Ayurvedic medicine, Chocolate is considered to be heating for the body and easily over-stimulating to the nervous system (brain) which really needs to stay cool, calm & collected! Due to these and some other reasons, Chocolate is not something you will find your Ayurvedic practitioner generally prescribing.

A big part of Ayurveda’s holistic approach is about maintaing balance not become too ‘rigid’ or stuck in one thing or another.

We always have wholesome choices we can make however. When it comes to eating ‘treats’ and things of a ‘Chocolaty’ kind… This is the way I like to do it!

Ingredients:

  • 10 tblsp’s of Coconut oil
  • 3-4 Tbsp’s of Carob powder
  • 1 Tbsp of Tahini/Almond butter or Sunbutter
  • 1/4 tsp of Sea salt
  • Dash of Vanilla essence
  • 1 tsp of Cinnamon powder (In Ayurveda this helps the body digest Sweet foods & improves circulation)
  • Major ingredient, LOVE!

*To set the Chocolate’s you can use an ice-cube tray (one with silicon at the bottom for ease is best!)

 Method:

  1. Melt Coconut oil and pour into a bowl.
  2. Add your Carob to the bowl and mix with your favorite spoon.
  3. Add Tahini, Almond butter or Sunbutter and stir thoroughly. (We want the consistency as smooth as possible!)
  4. Next add the vanilla, cinnamon, salt and stir.
  5. Pour your mix into your chosen chocolate mould or ice cube tray and place the chocolates in the freezer for approx 30mins to allow them to set!

When they are ready to serve, pop out the hearts and enjoy these real – wholefood sweet treats!

An easy peazy, simple, homemade creation that will satisfy your Chocolate taste-buds & leave you feeling balanced and calm after-wards!

*Carob is naturally sweet. This recipe is 100% sugar free and sweetener free as this is how I love to make them 95% of the time! J To make these chocolate treats a little sweeter or for a special occasion, you can add a dash of maple syrup – both delicious and slightly different! J

* Customise your choclates by adding a few Goji berries on top, some currants, desiccated coconut or whatever your tummy, heart and taste-buds desire! Yum! 

With Love!

x Lorien